Making edits to PsychoPy’s documentation
First you’ll need to have your own “fork” of PsychoPy® - this is a copy of the code which is yours to edit, without affecting the main code. Click here for a how-to for forking |PsychoPy|
If you only want to change a single file:
For example, you’ve spotted a typo in one of the documentation pages, want to fix a broken link, or add in a few extra paragraphs to improve the clarity of the page. Essentially anything that involves you changing just one file. The easiest way to do this is directly within GitHub itself.
If you’re not already aware, it’s worth noting how the URLs in the documentation are linked to the folder structure of the PsychoPy repository: All of the documentation files are located in the folder docs > source. Each html page is created from a reStructured text (rst) file, and these files are stored in several folders. For instance, the page: https://psychopy.org/builder/routines.html is created from the routines.rst file located in: docs/source/builder.
Let’s imagine that you want to change that routines.rst file:
In your fork of the PsychoPy repository, click through to the routines.rst file located in: docs/source/builder and click on the ‘edit’ pencil icon:
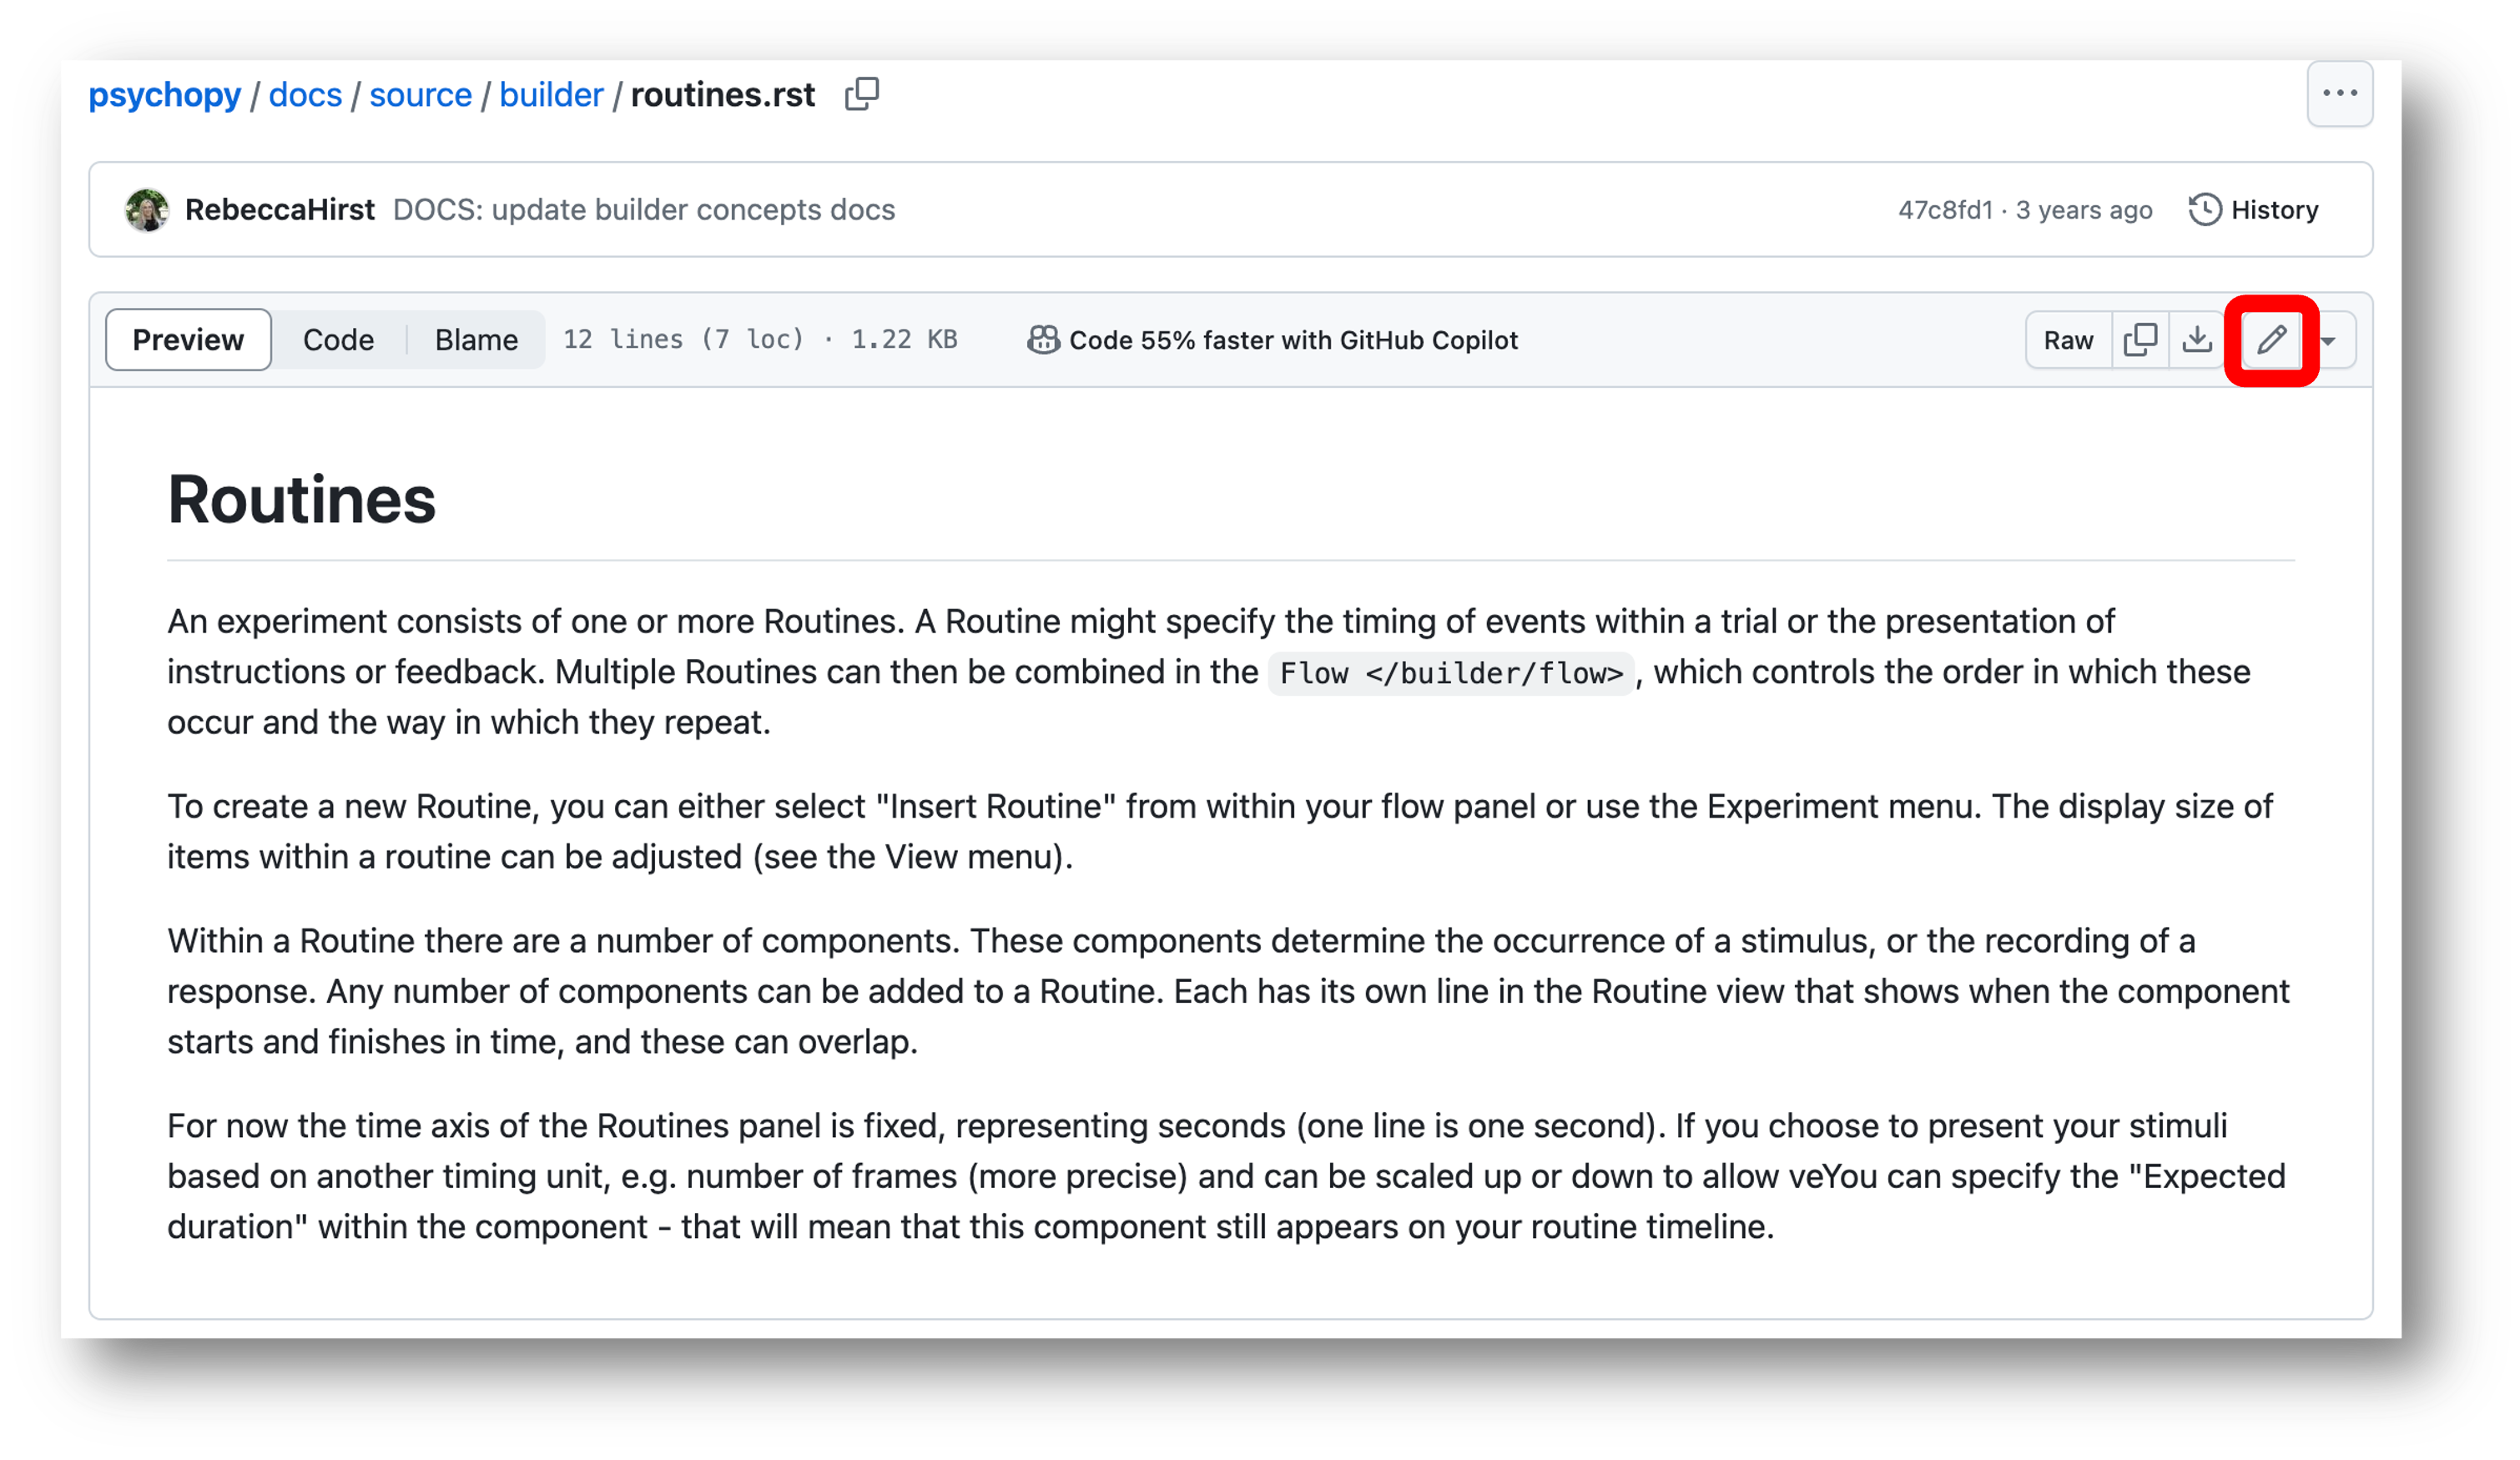
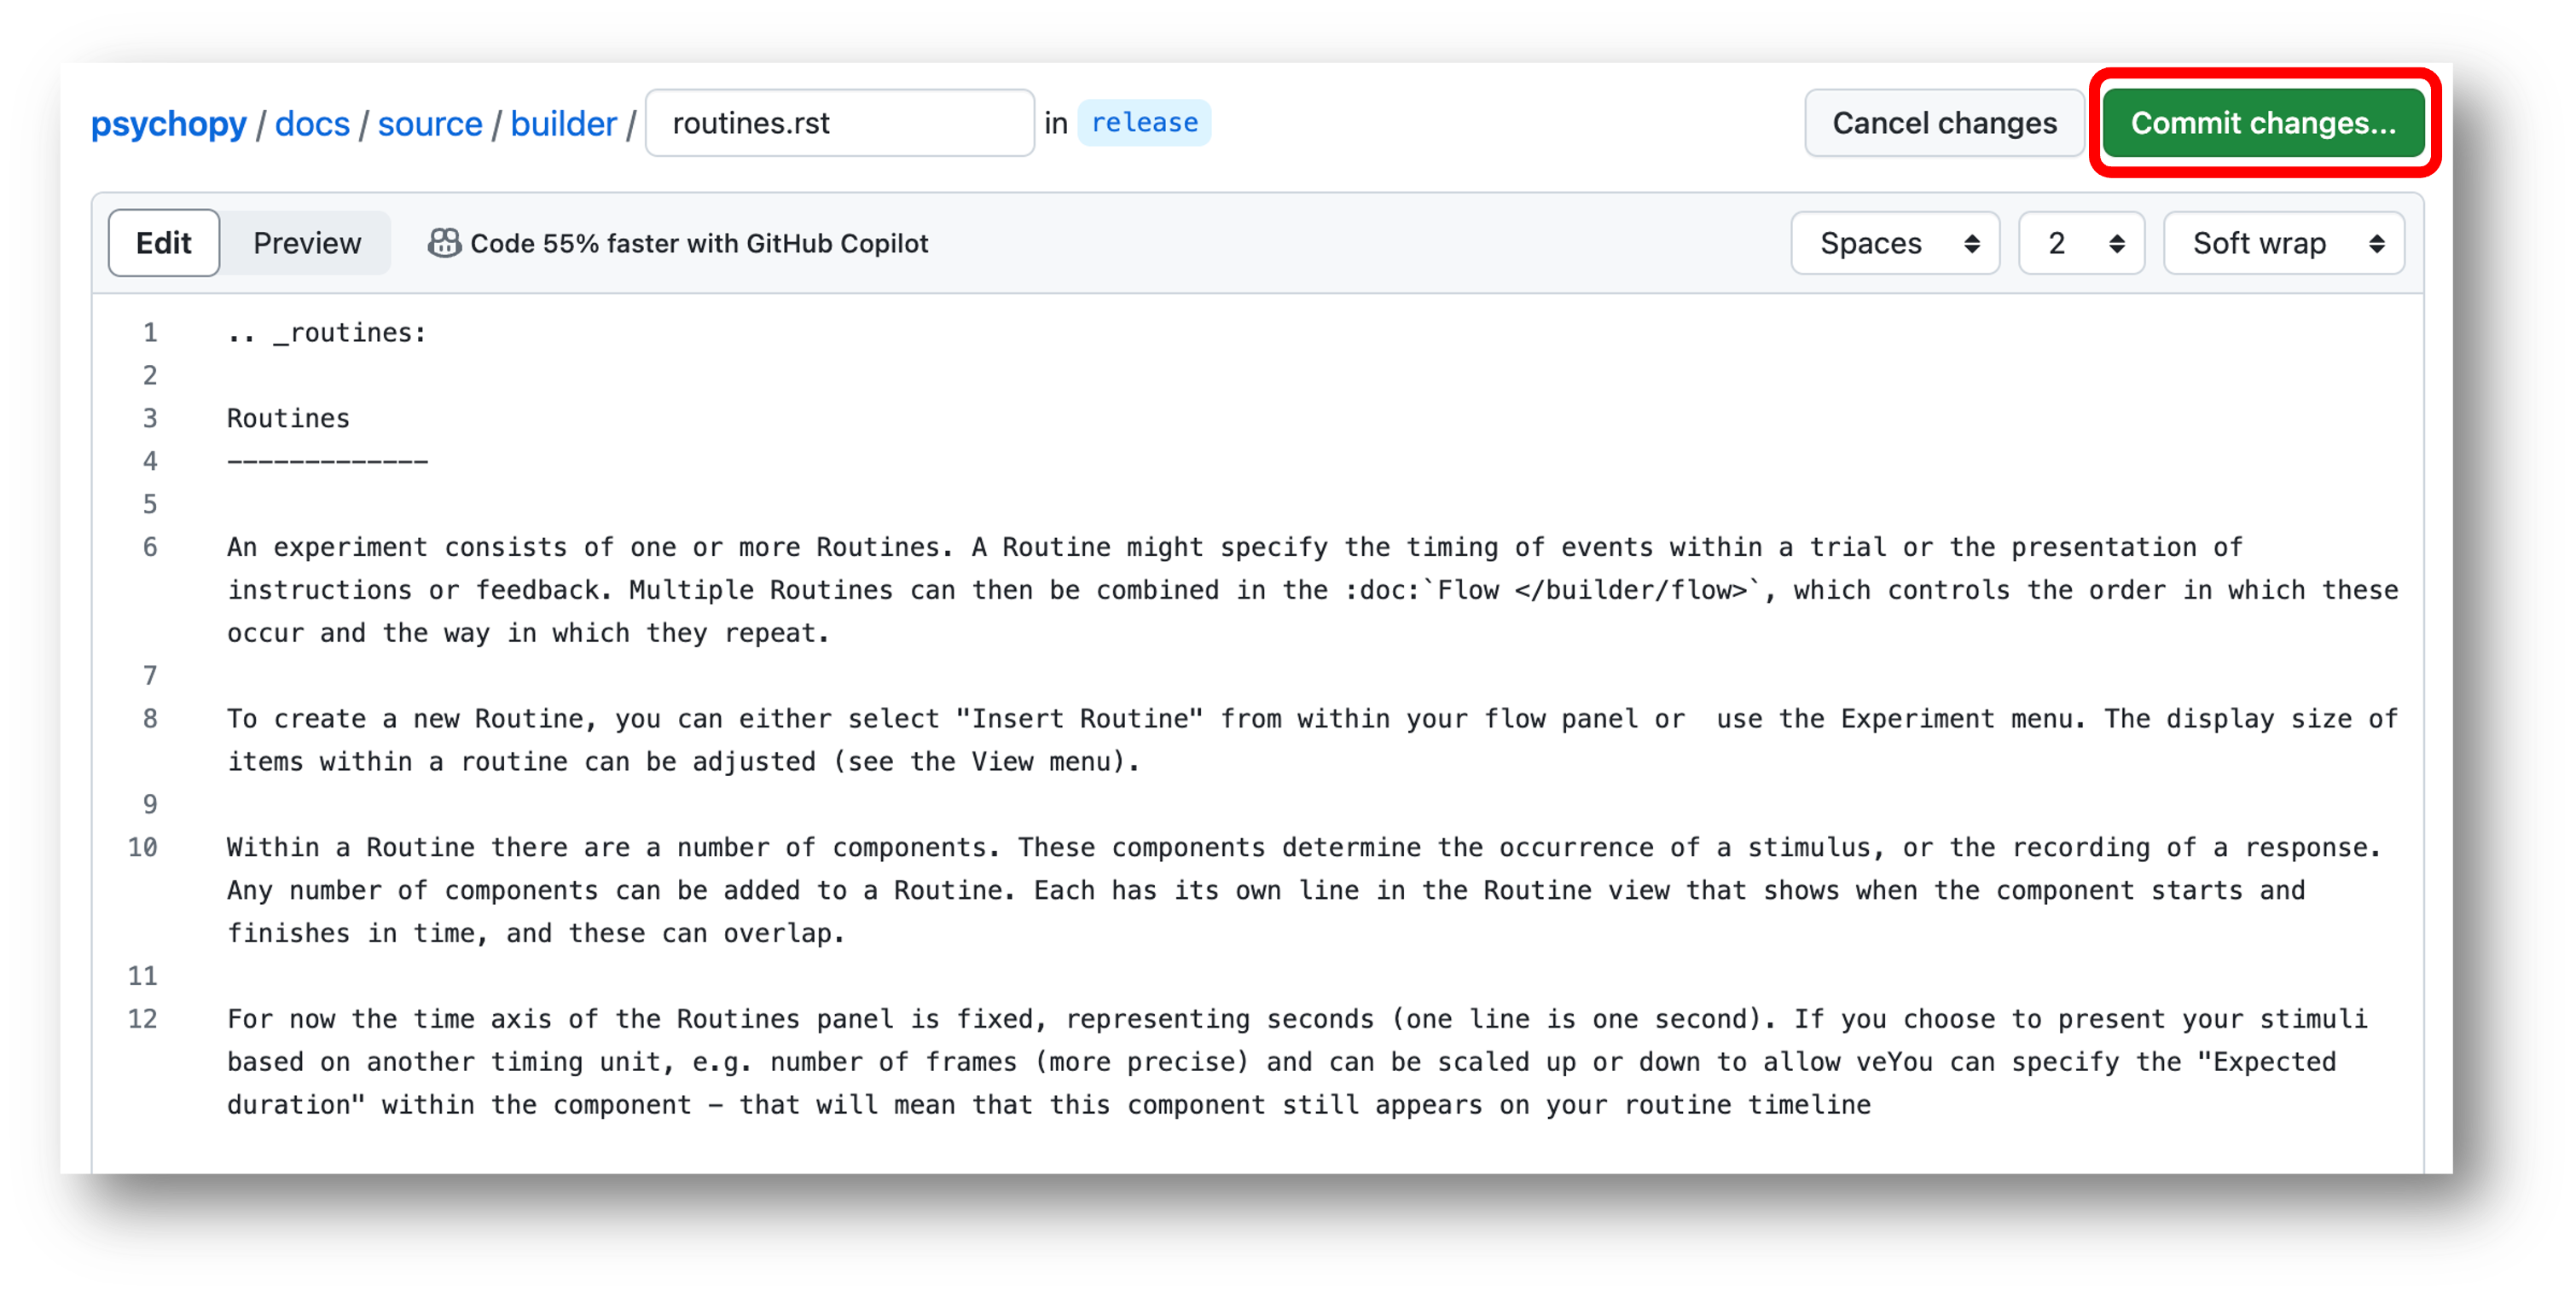
Make the changes you need to.
Click on the ‘Commit changes…’ button that becomes active when you’ve made changes:
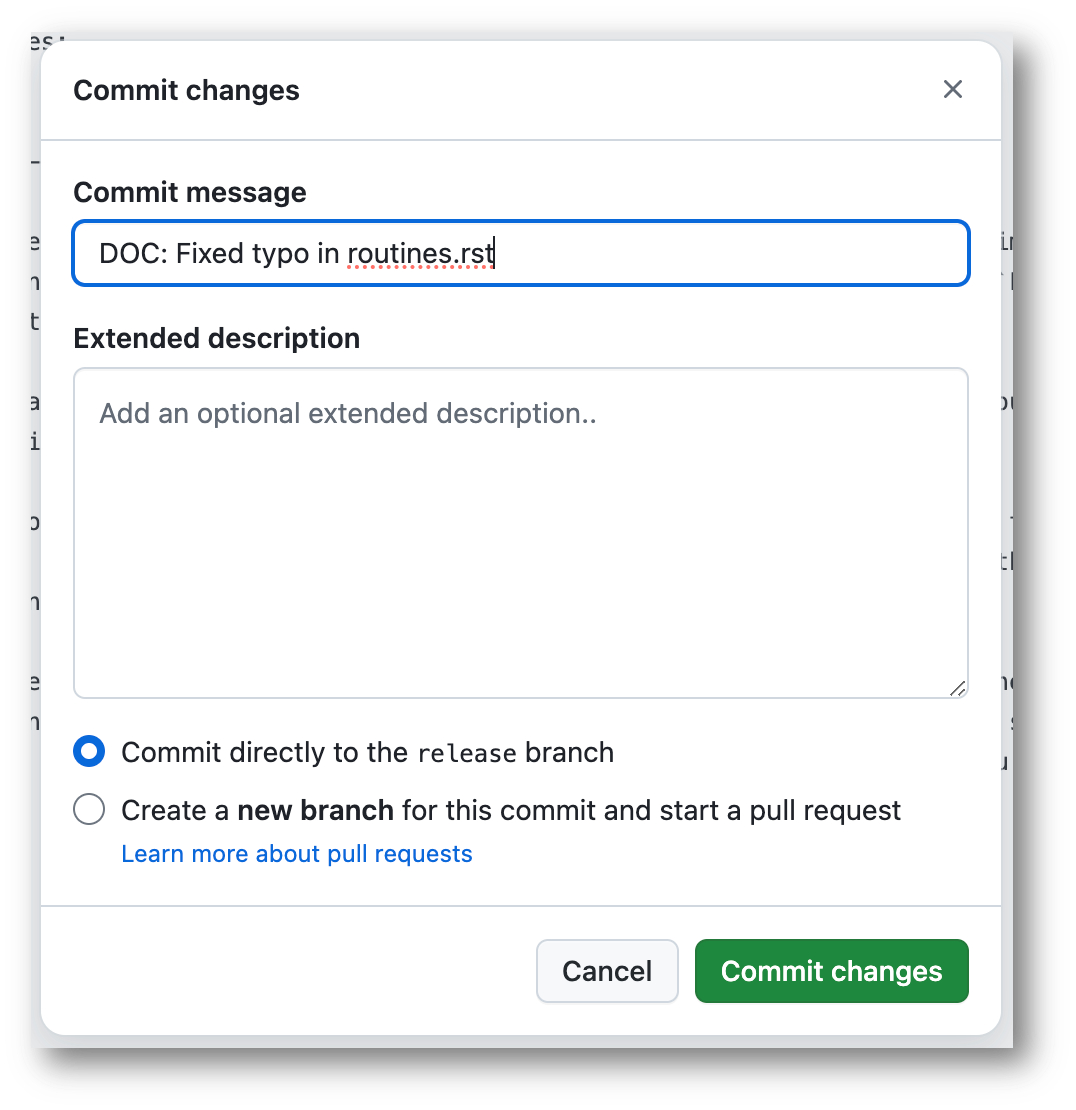
Add a commit message: For documentation changes we use ‘DOC:’ followed by a brief description of what we’ve changed (see Using the repository for more on commit messages):
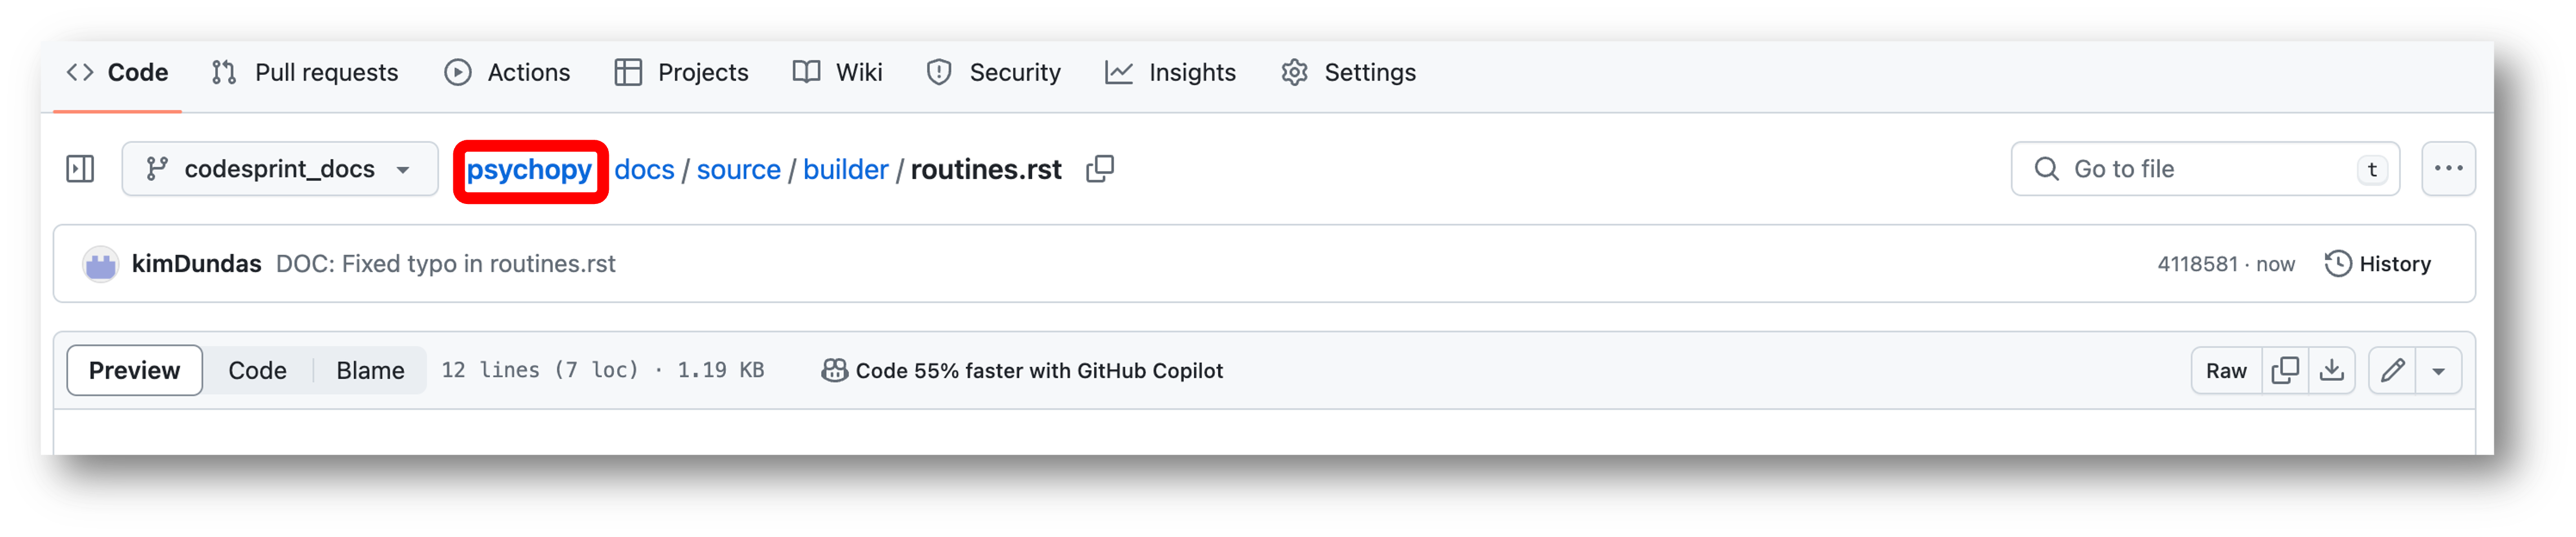
Commit your changes: This commits the changes you’ve made to your PsychoPy repository. You now need to make a pull request so that those changes can be merged into the main PsychoPy repository.
Make a pull request:
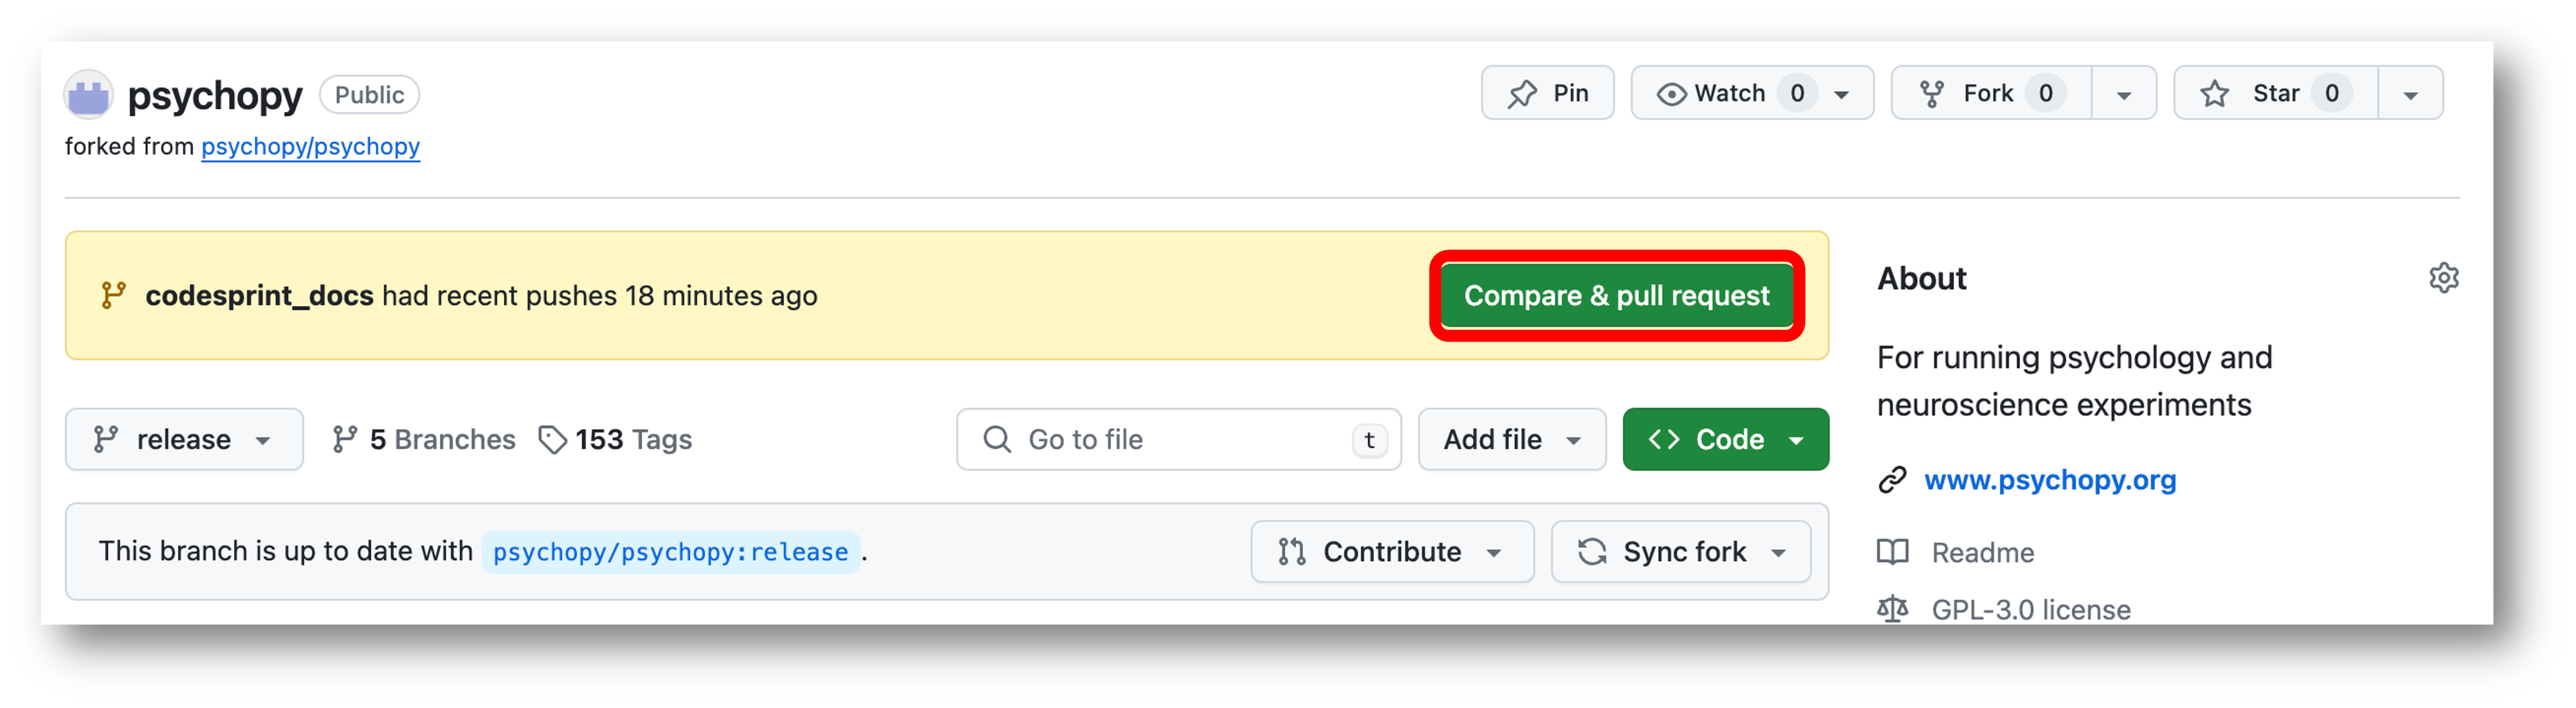
Click back into your main PsychoPy repository:
Click on the message that says ‘Compare and pull request’:
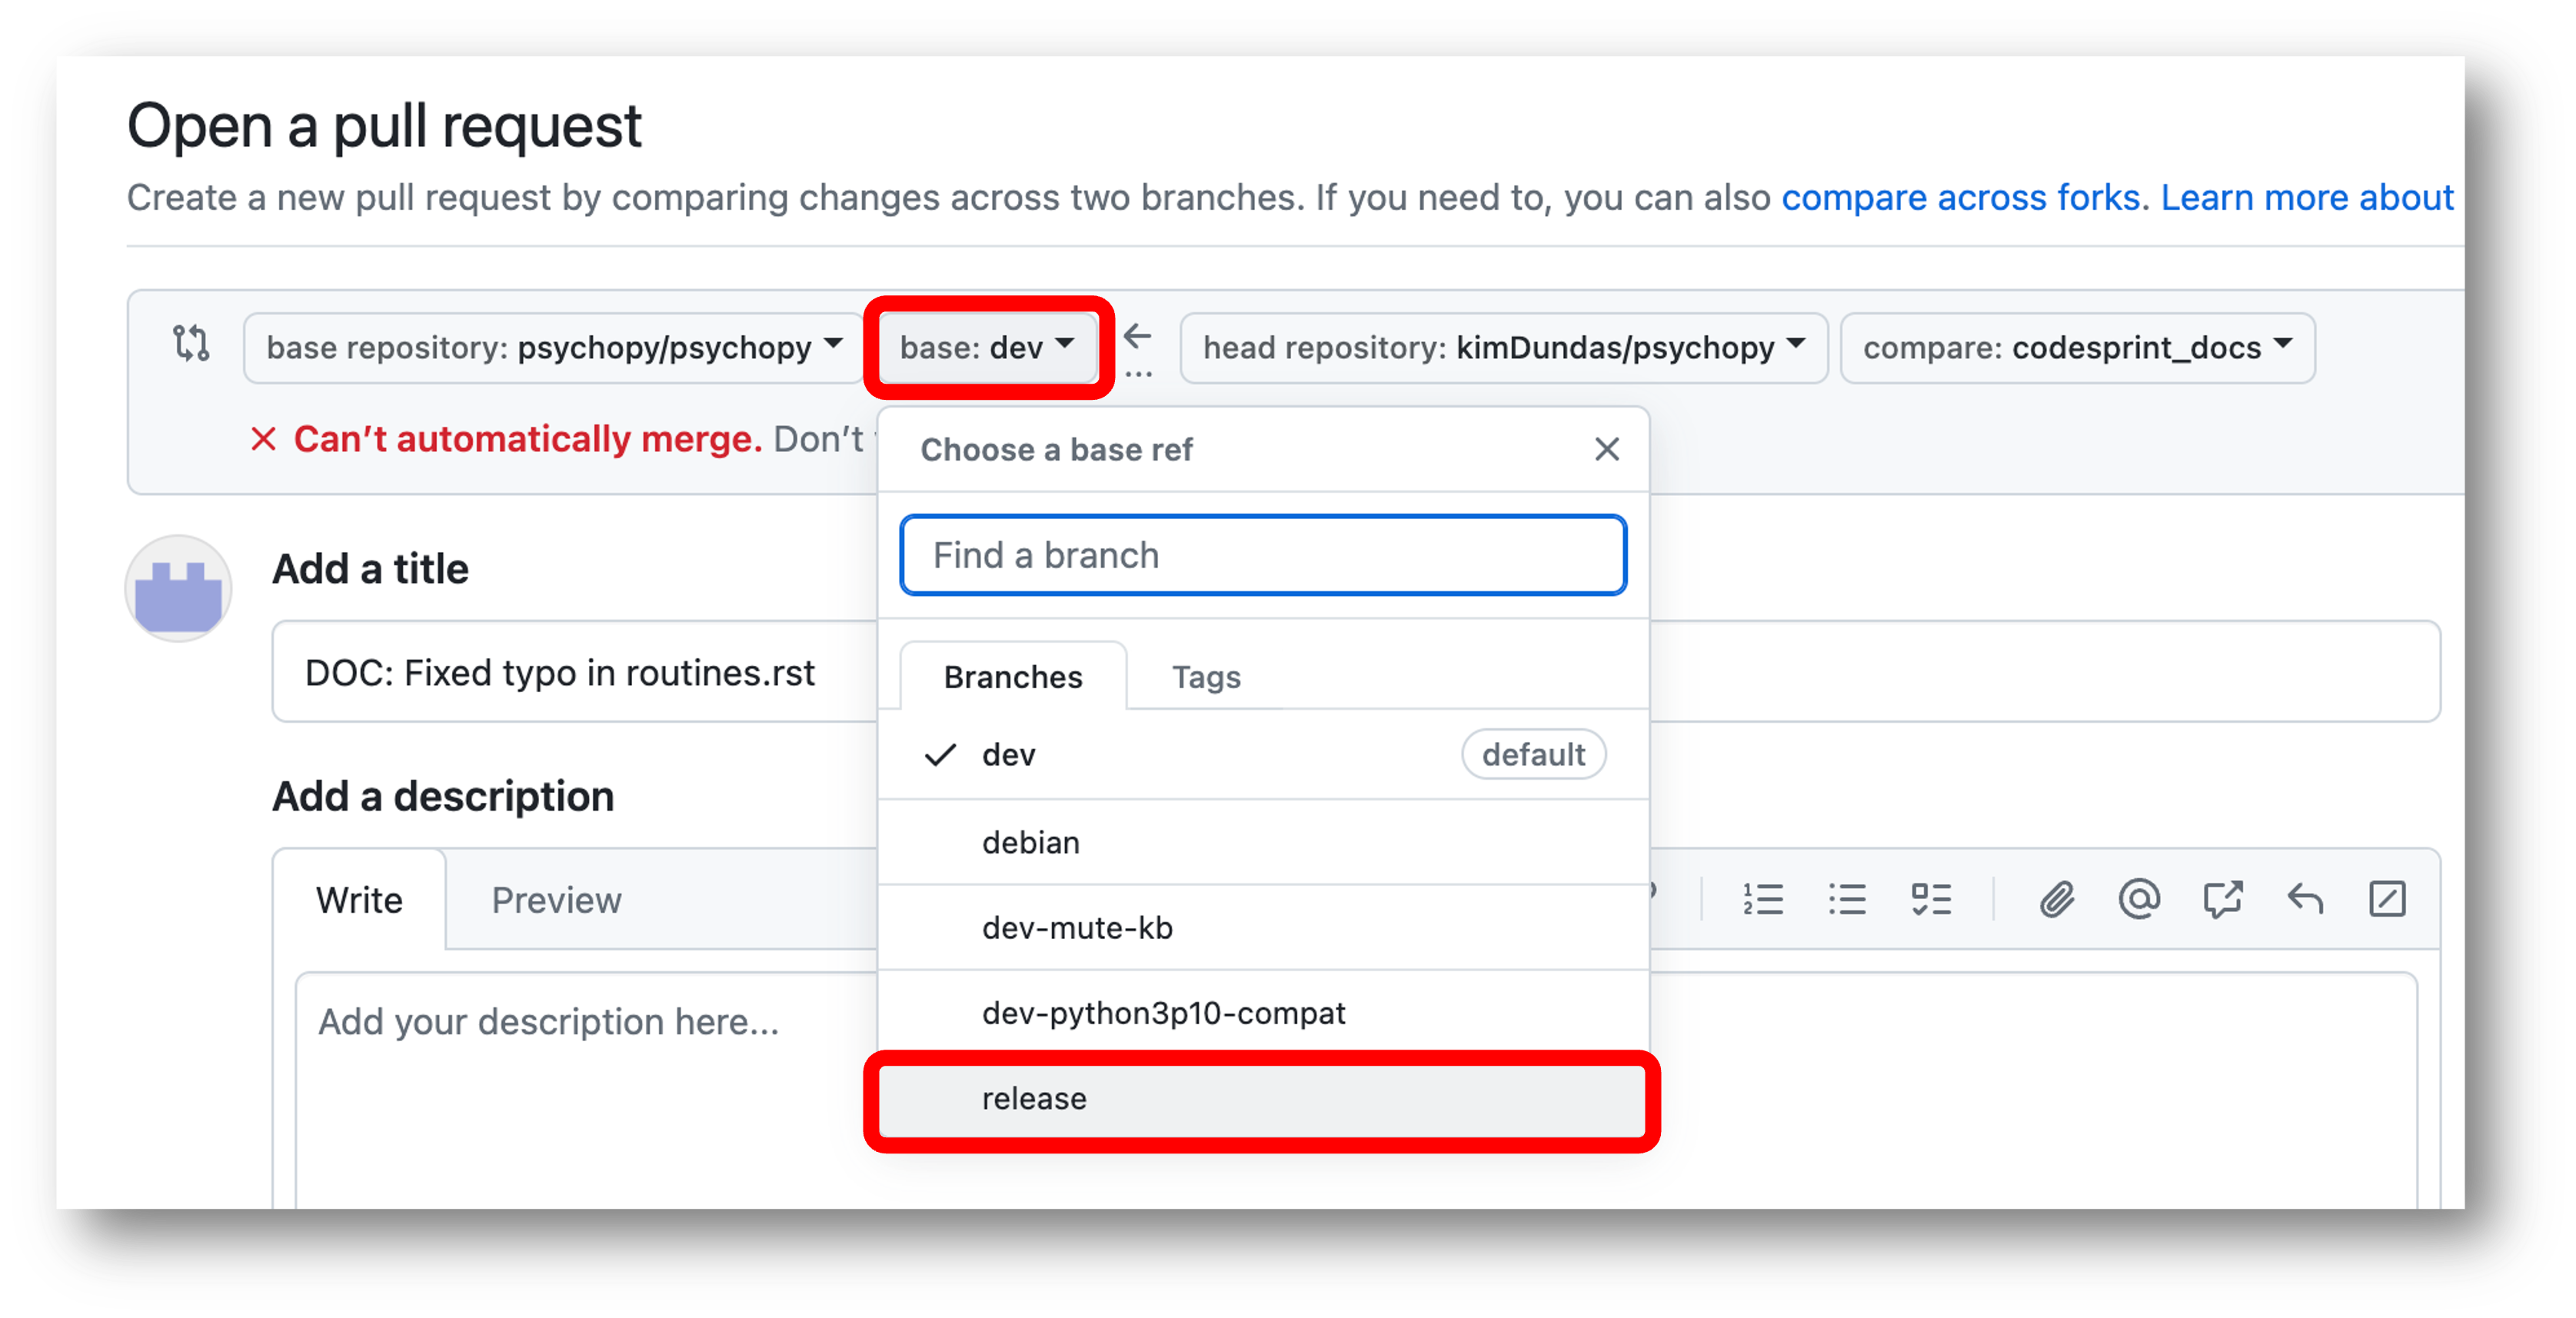
As you want to contribute to the documentation on the website, you’ll need to select ‘release’ as your base branch:
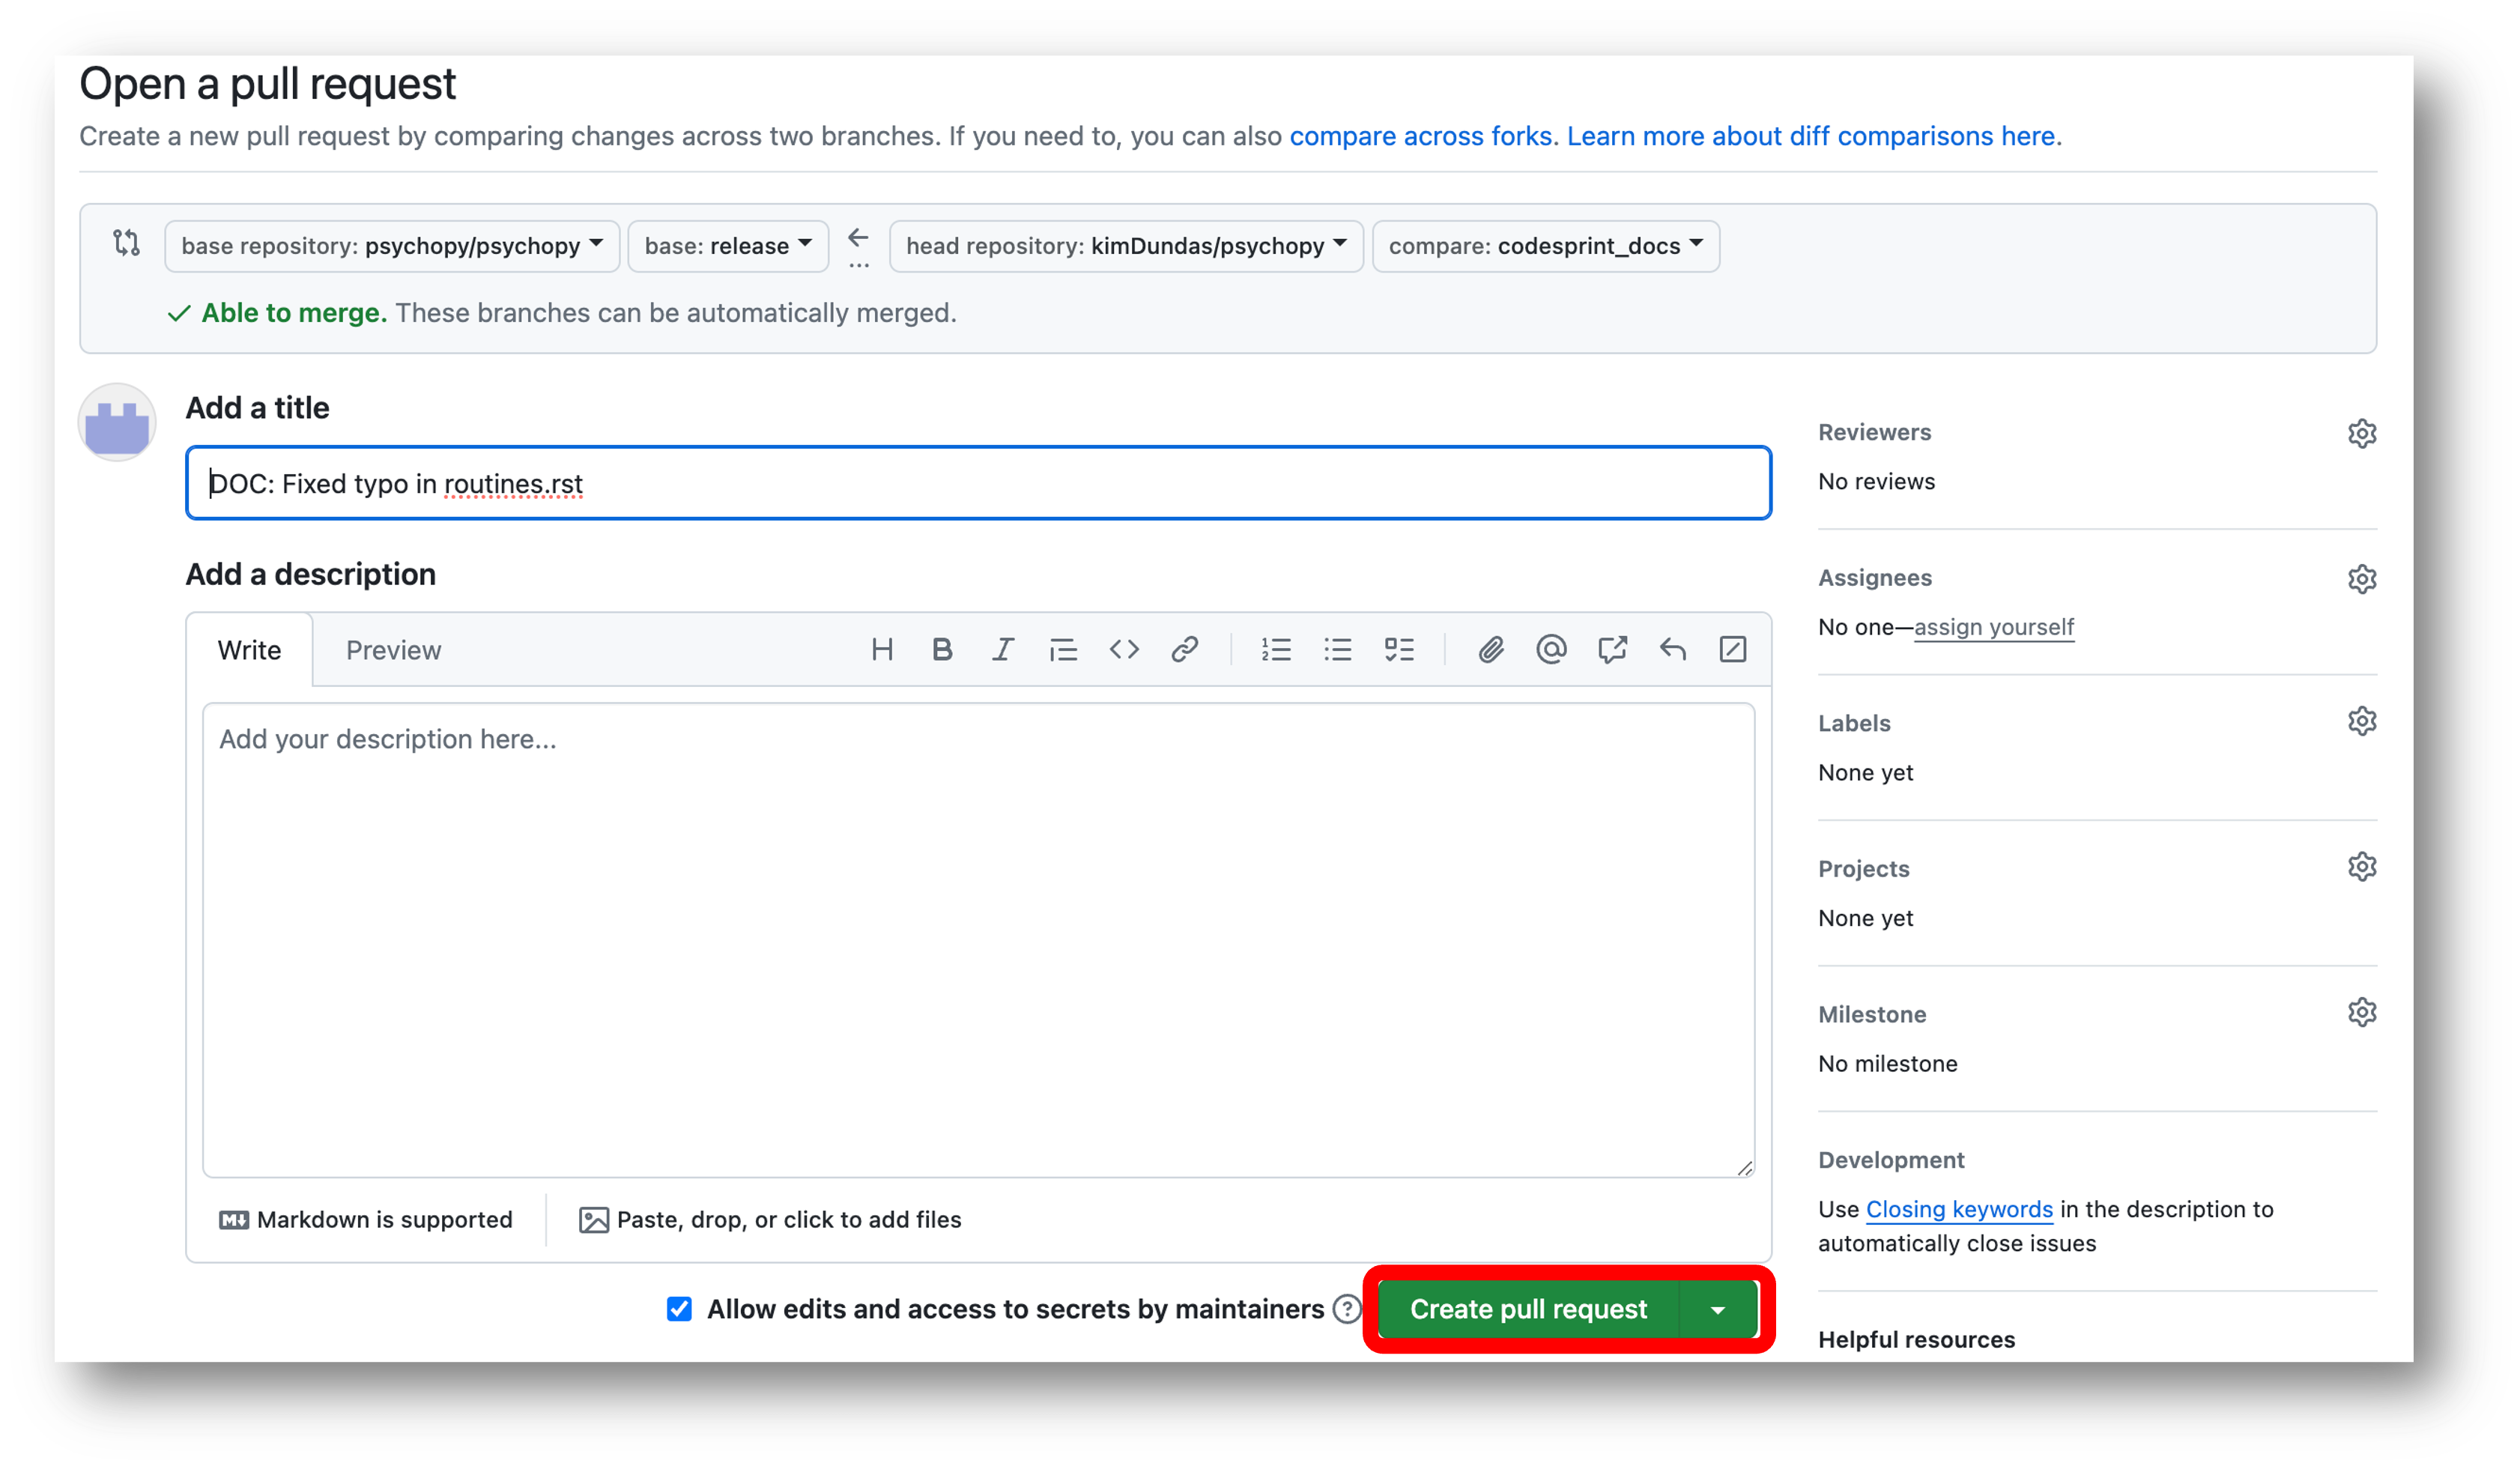
Make sure the title of your pull request matches the one that you put as your commit message. You can add a description of your changes if you like, too. Then click ‘Create pull request’:
You’ve made a pull request! Your code will be reviewed, and you’ll receive an email when your changes have been pulled in!