
Communicating via a Parallel Port
Step one: Set up your Parallel Port component in Builder
PsychoPy has a Parallel Port component in Builder view. This can be found in the I/O component drop down. This component supports both traditional parallel ports and USB devices.
If you’d like to use a Parallel Port to record responses (for example from a button box) please read this excellent thread from our Discourse Forum user jtseng.
Add your Parallel Port component to your routine in the same way that you would with any other component:
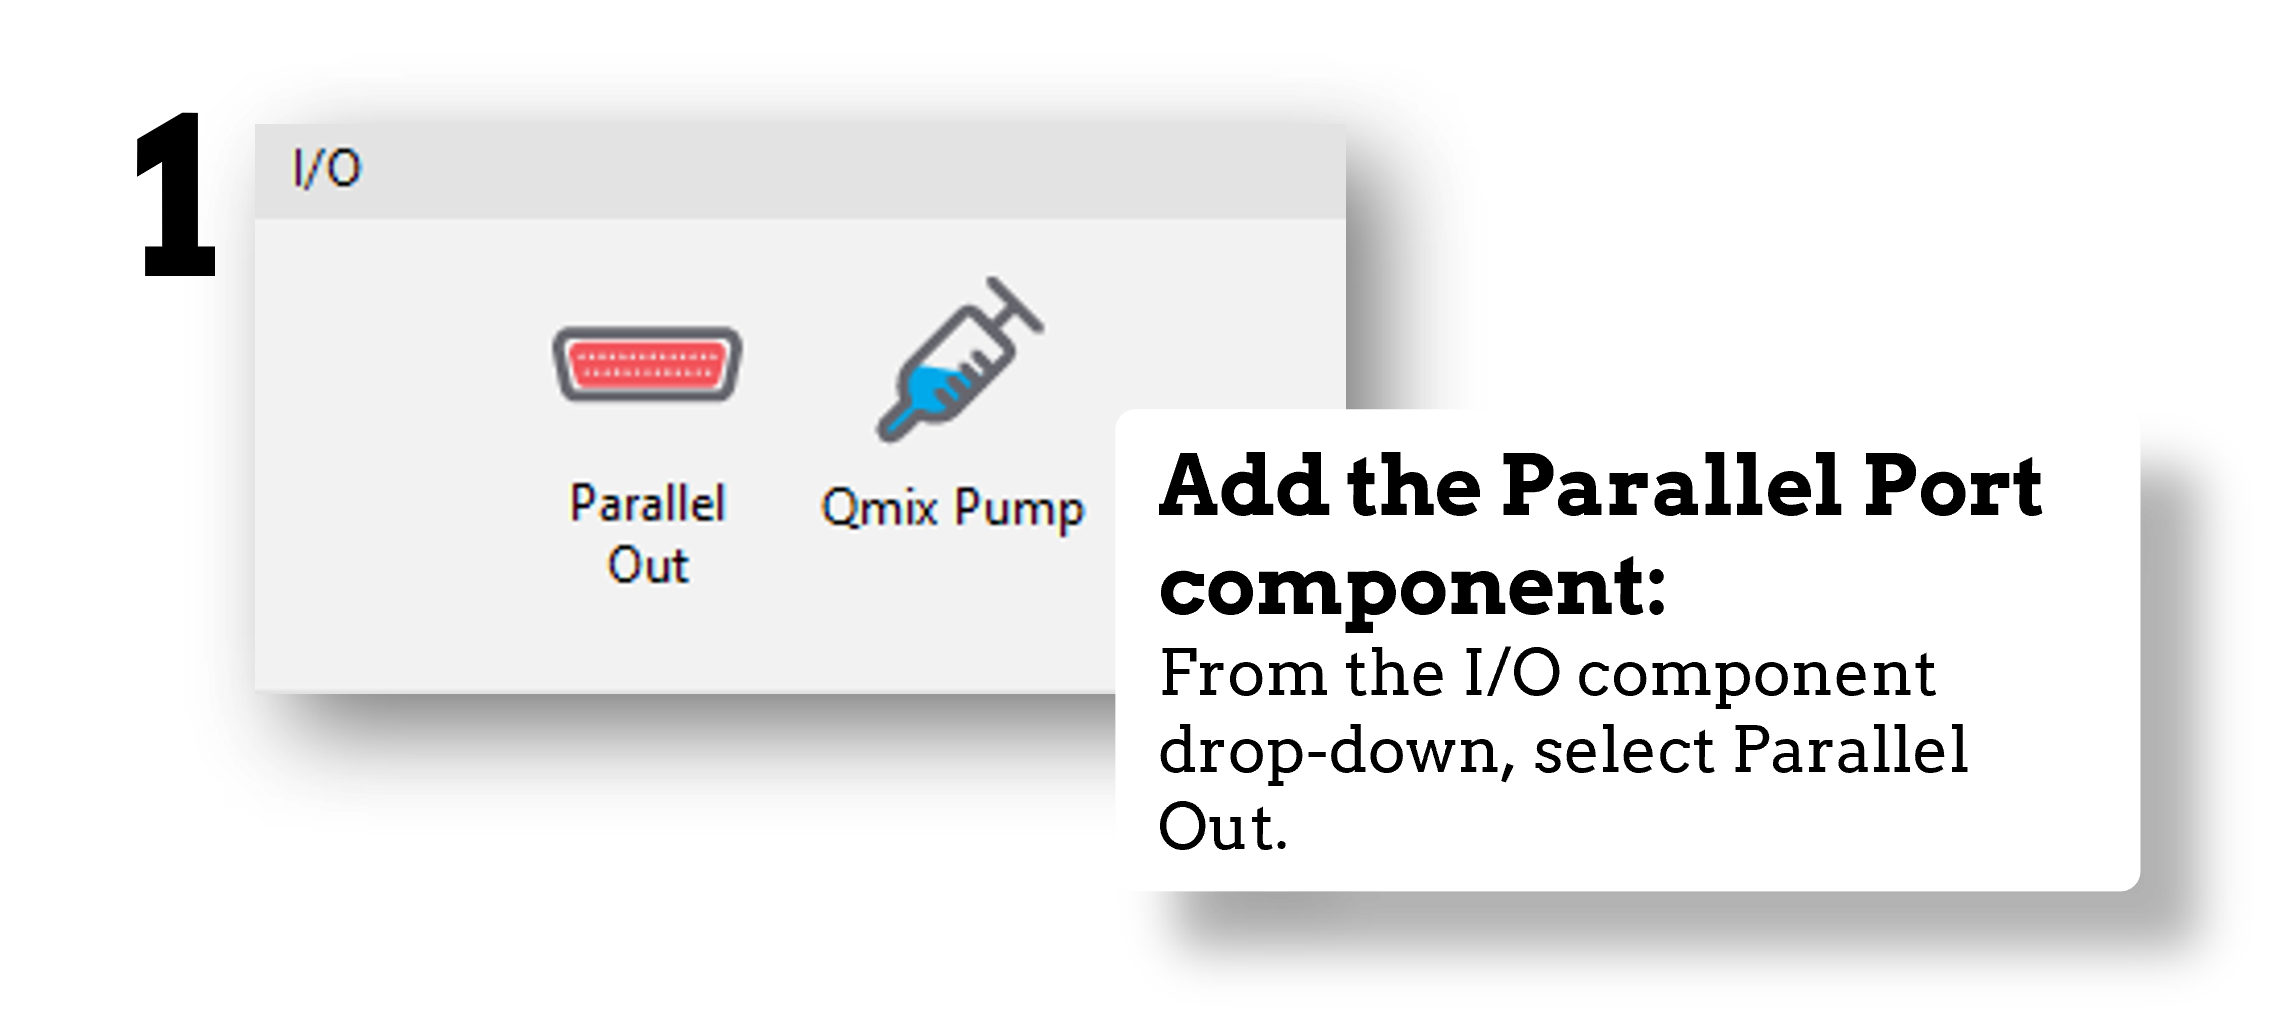
Fig. 29 Select the Parallel Port component from the I/O or EEG component drop-down menus.
Now, imagine we want our trigger sent to indicate stimulus onset. We could do this by simply setting the onset time of the trigger to match that of our stimulus. But this is not the most precise way to do this. Also, this doesn’t help us if we want to send our trigger to indicate something with variable timing, such as when a response is made.
For maximum precision, we’ll set the trigger to be sent when the status of our stimulus is set to started:
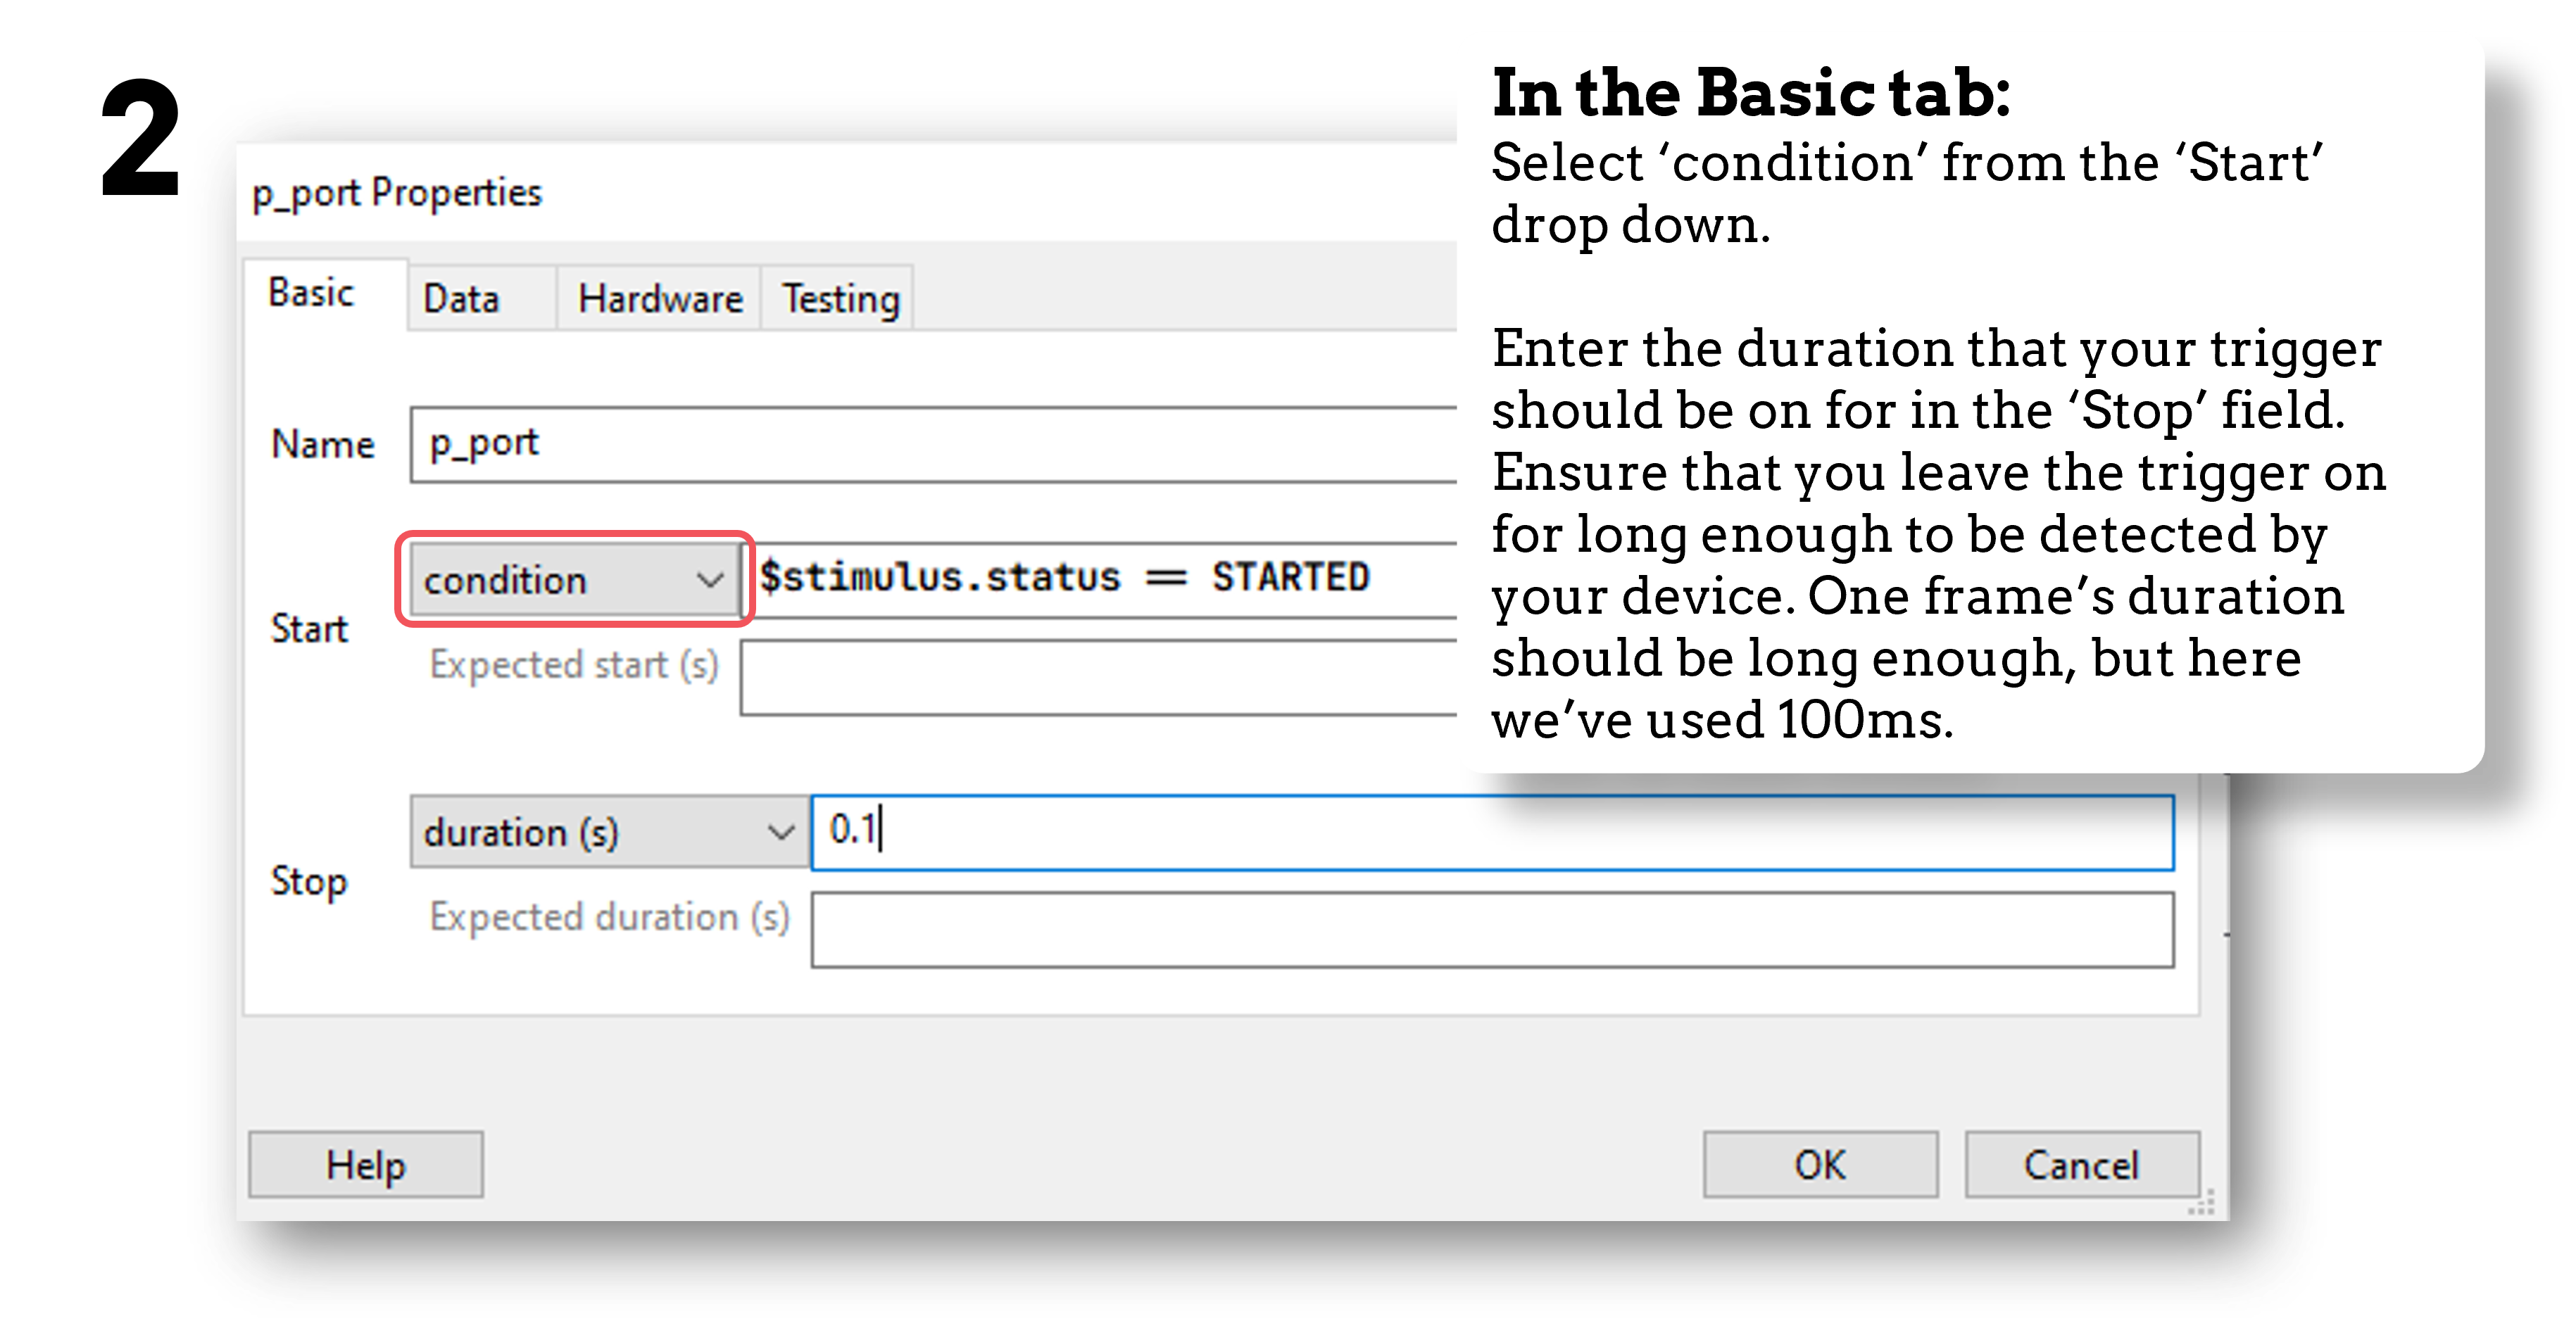
Fig. 30 In the Basic tab, we’ll choose to start our trigger when a condition is met by selecting condition from the Start drop down.
Now we set that condition by inserting the following code:
stimulus.status == STARTED #Change 'stimulus' here to match the name of your own component
Now, in the Data tab, we set the data we want the trigger to actually send:
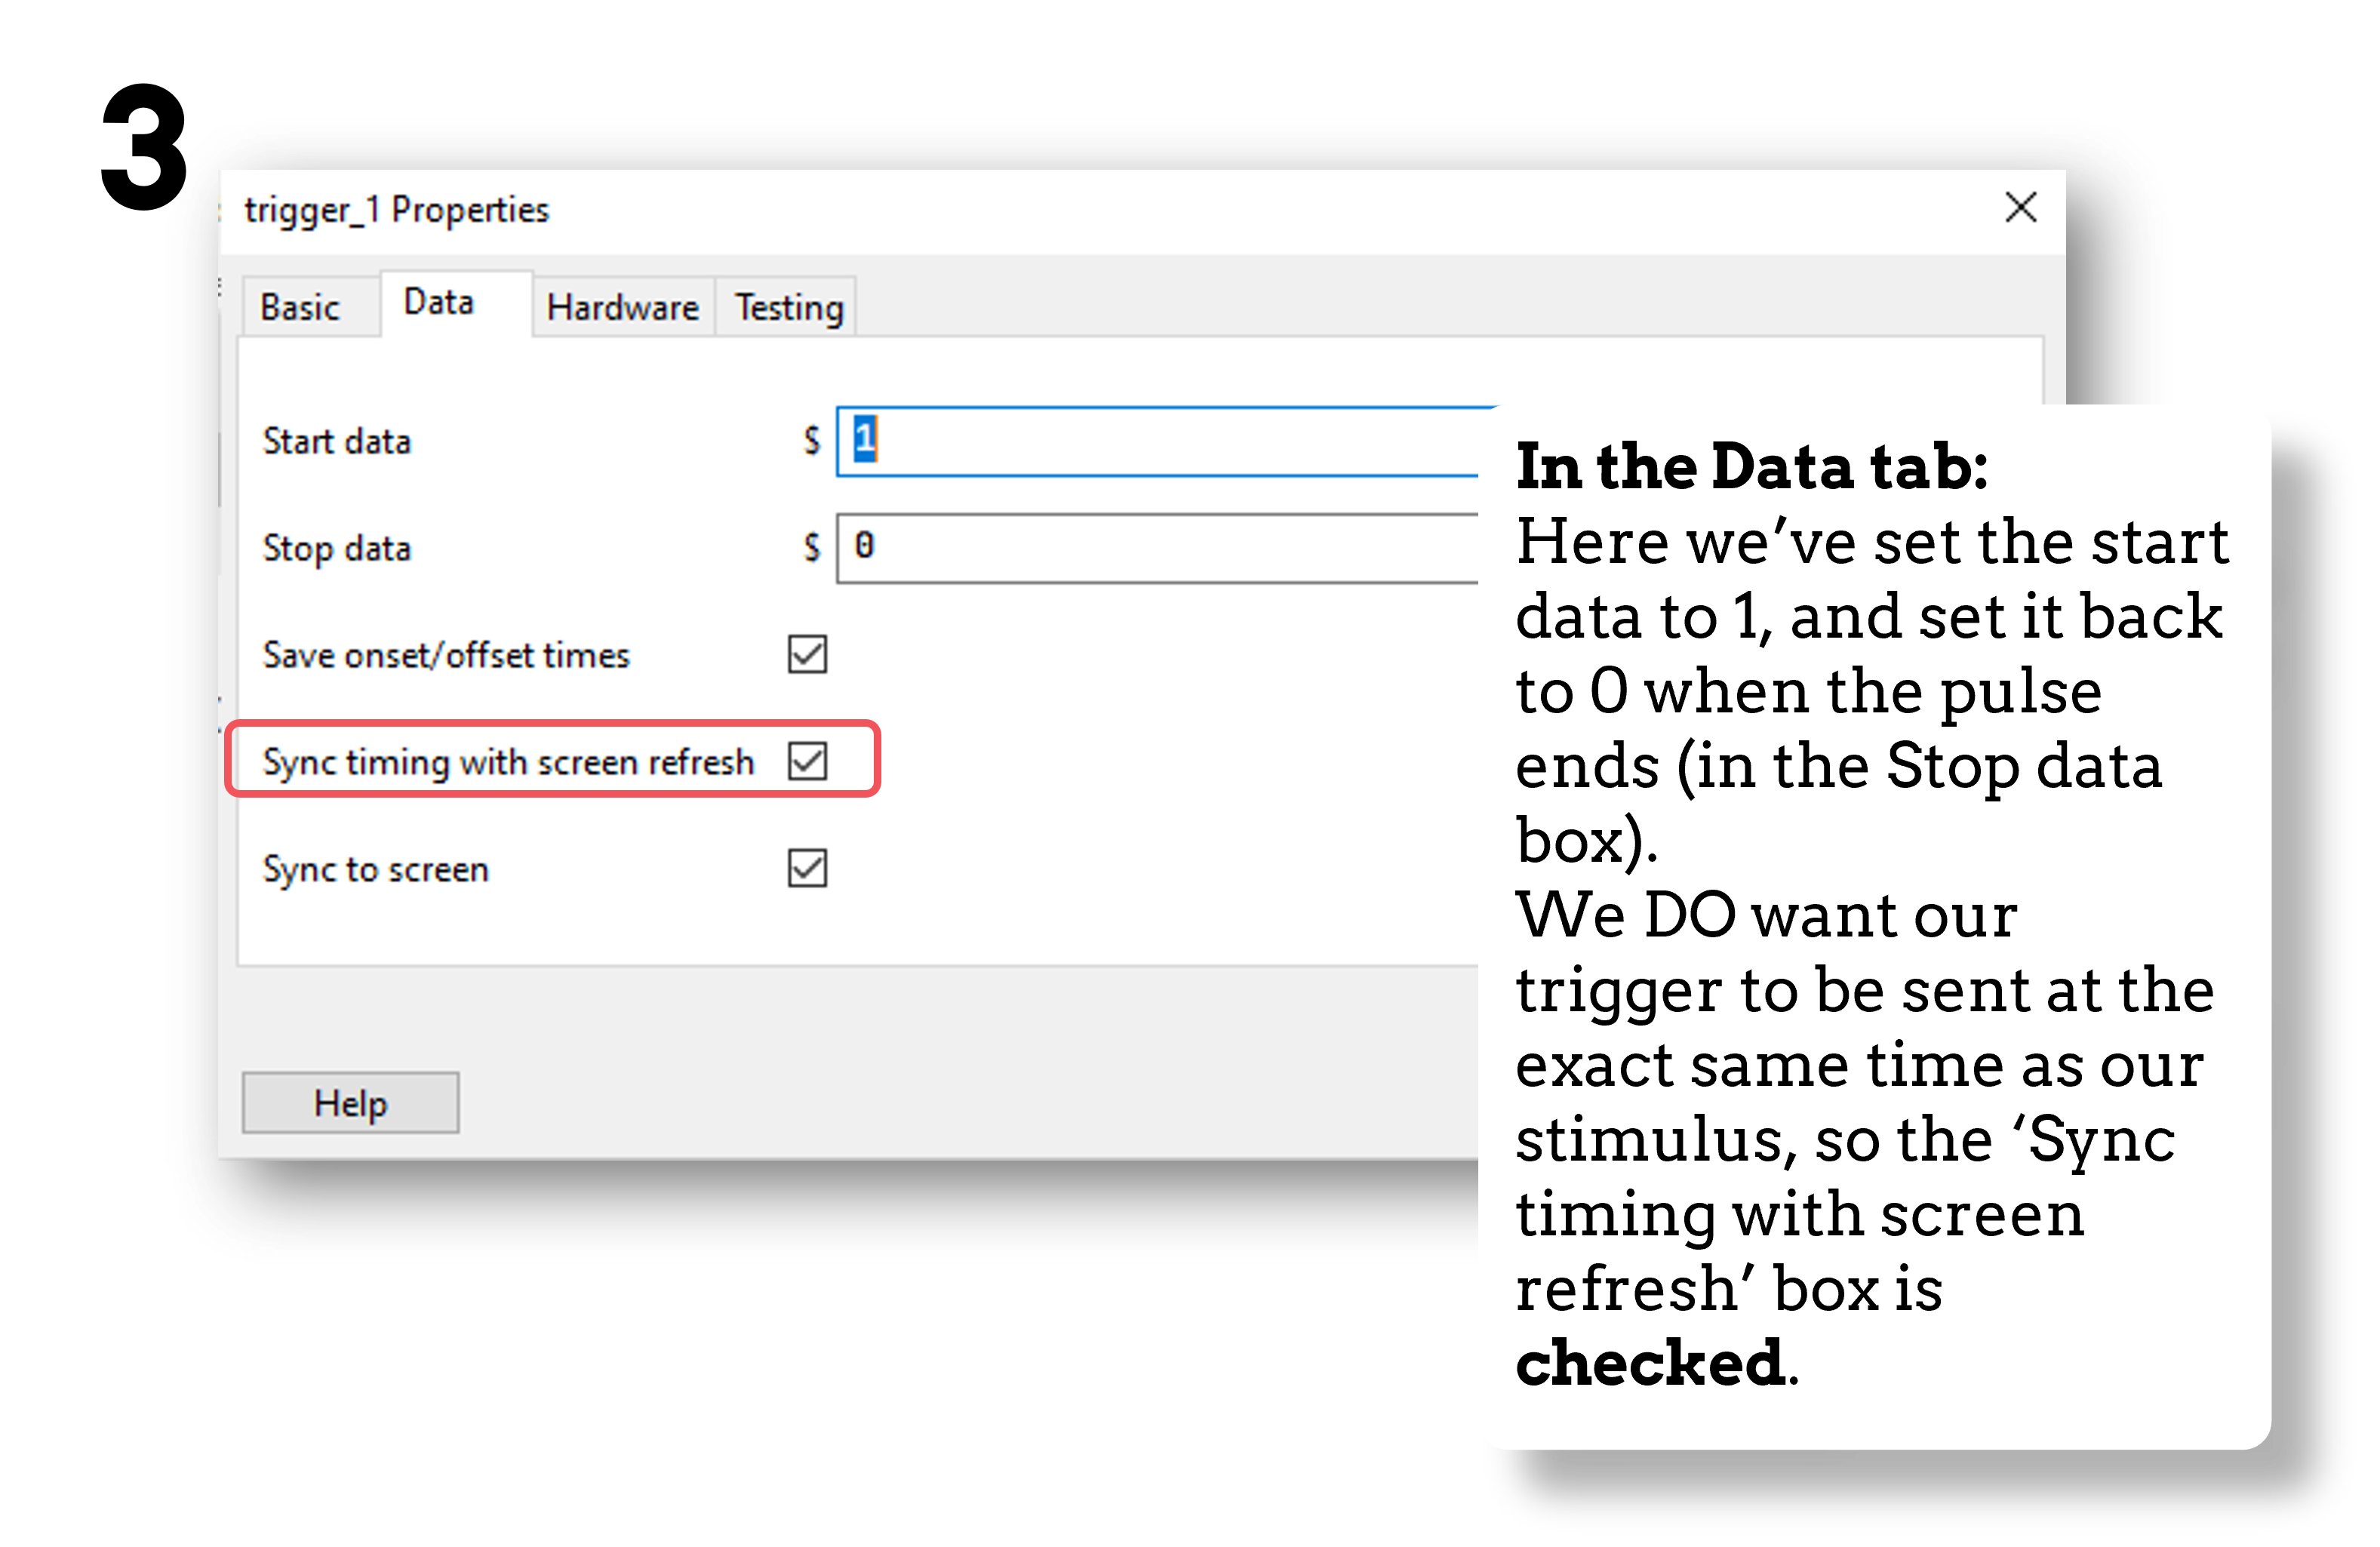
Fig. 31 Set the data to be sent by the trigger
So our component is added and we’ve set it up the way we want. We now need to make sure that the trigger is going to be sent to the right place!
To do this, we’re firstly going to check our port address.
We can check this on our computer (not within PsychoPy itself) by navigating to: Device Manager > Ports > Find the parallel port that you are using from the drop down > Right-click Properties > Resources tab > The port’s address is under the Settings header.
Note
The address of the port is not the same as the name of the port. For instance, the name of the port could be “LPT 1” but the address might be “0378”.
Now, in the Hardware tab of the parallel port component in PsychoPy, select the correct parallel port address:

Fig. 32 Select your port from the drop down, if you don’t see it listed just follow the next step.
If you do not see the correct address in the drop down, in PsychoPy navigate to: File > Preferences > Hardware > Parallel Ports > Click the “…” icon > Click the New Item icon > Enter the parallel port address > OK > Apply:
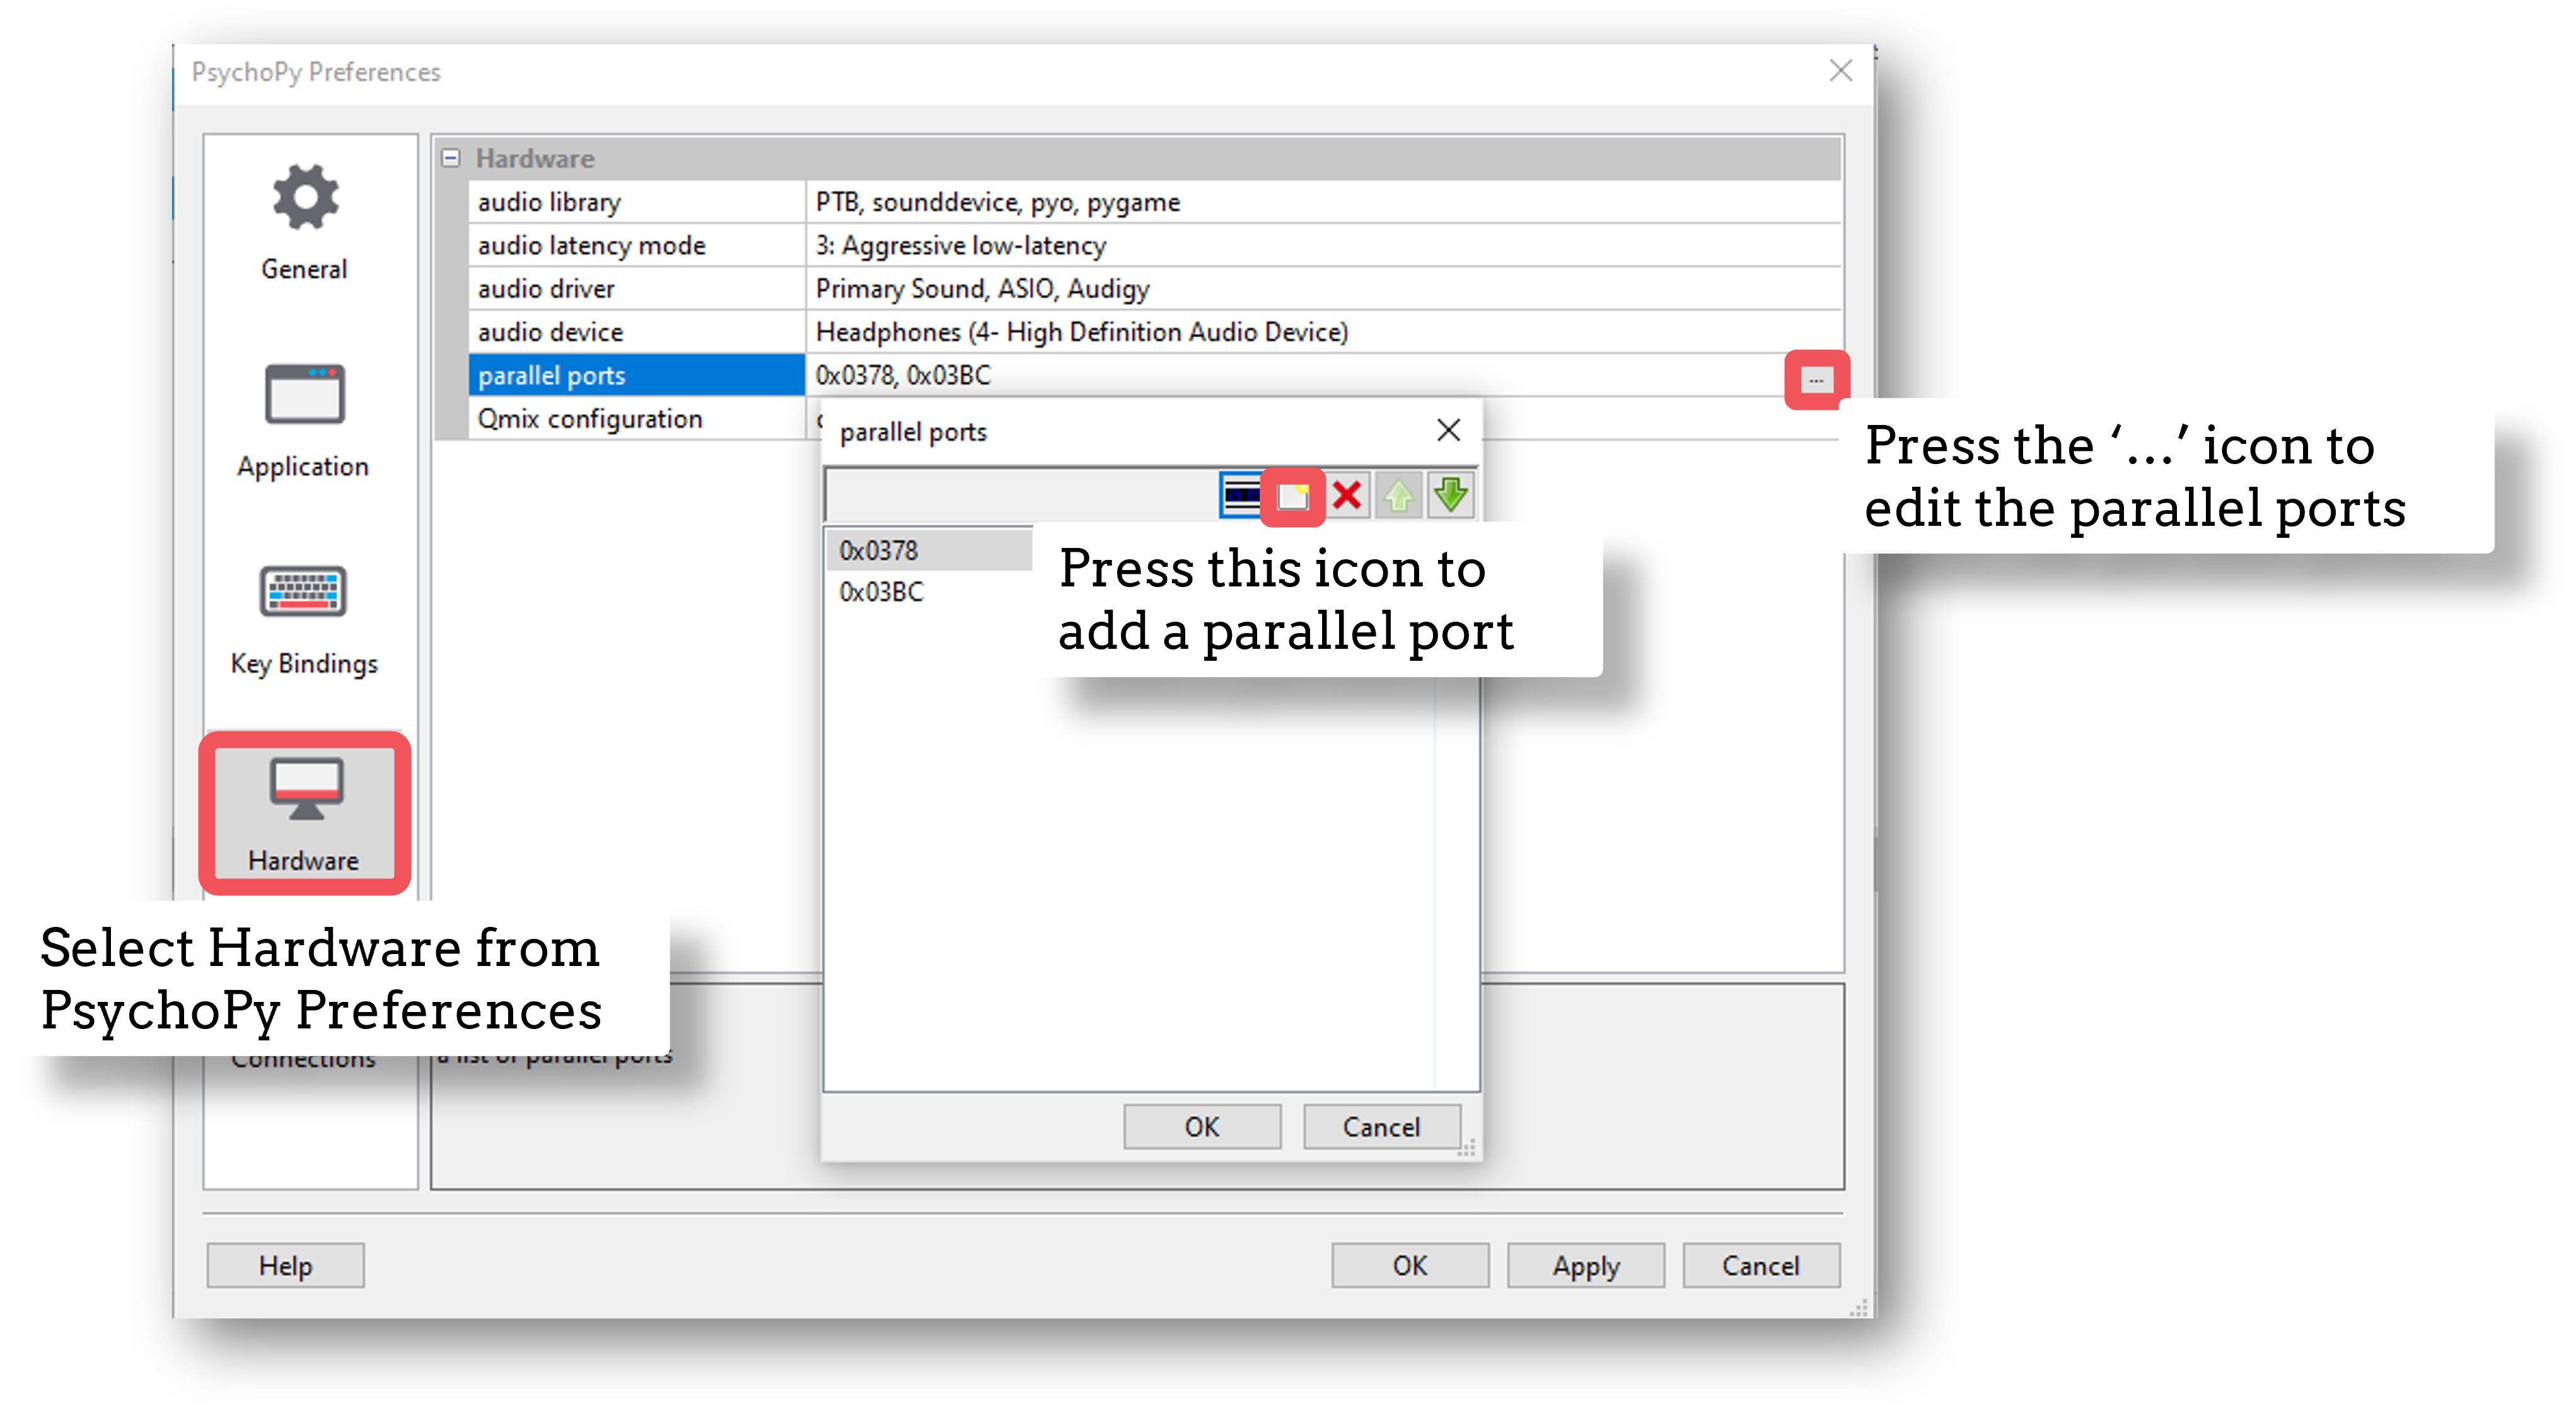
Fig. 33 Follow these steps to add your port address, only if it was not already in the drop-down menu.
Note
The parallel port address is usually a hexadecimal address. We tell PsychoPy to read it as such by prefixing with “0x”. So if your port address appears in Device Manager as “0378-037F” for example, in PsychoPy this would be written as “0x0378”.
The correct port address will now appear in the drop down menu in the Hardware tab of the Parallel Port component.
Step two: Make sure you have the correct drivers installed
If you’re using a Mac, it’s recommended that you skip this step. For Windows users, a common error when trying to communicate via a Parallel Port component is that certain drivers are not found. We’re going to pre-empt that error by downloading and installing the correct drivers now.
Download the InpOutx64.dll and InpOutx32.dll files from here. You need to use the “Binaries only - x86 & x64 DLLs and libs” option under the Download Links subheading near the bottom of the page:
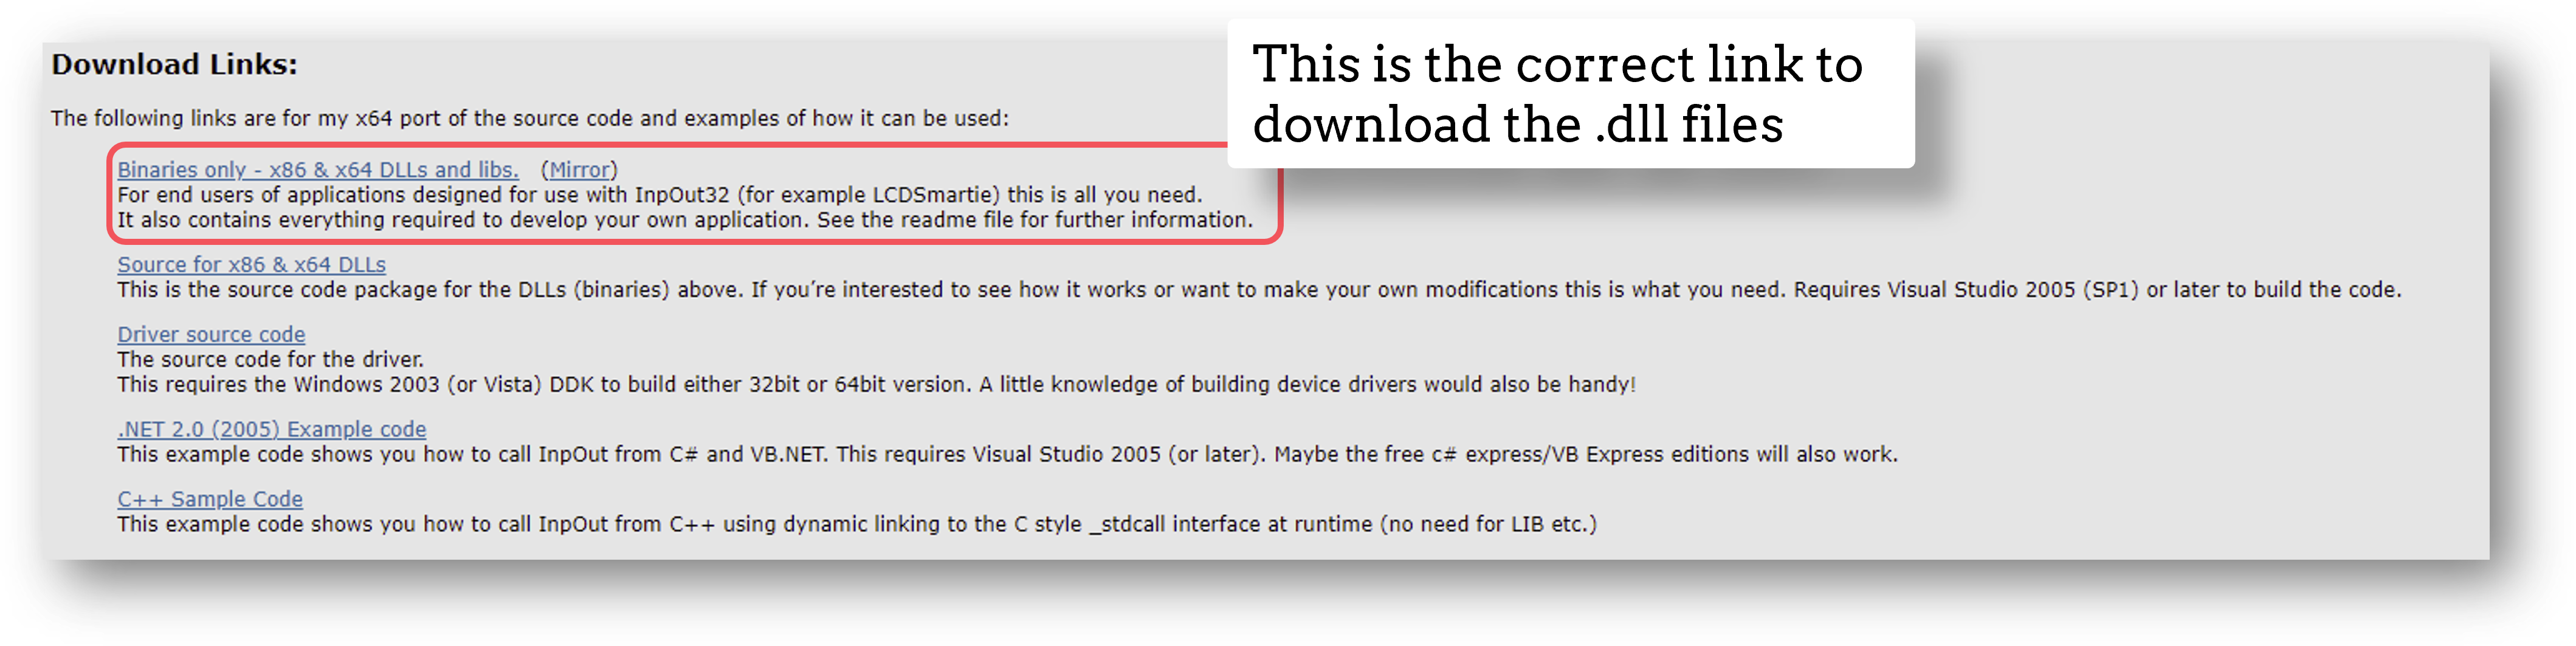
Fig. 34 The correct folder to select is shown here.
When downloaded, find and extract the .zip folder. This will be called something like “InpOutBinaries_1501.zip”.
In the unzipped folder, find and copy the files “inpoutx64.dll” and “inpoutx64.lib” from the x64 folder, and then the file “inpout32.h” from the Win32 folder. Place a copy of all of these in the same folder as your PsychoPy experiment file (the one with the .psyexp filetype).
Restart PsychoPy (save your experiment first!)
Step three: Test your triggers
To check that everything works, we recommend that you set up a very basic experiment that looks similar to this:
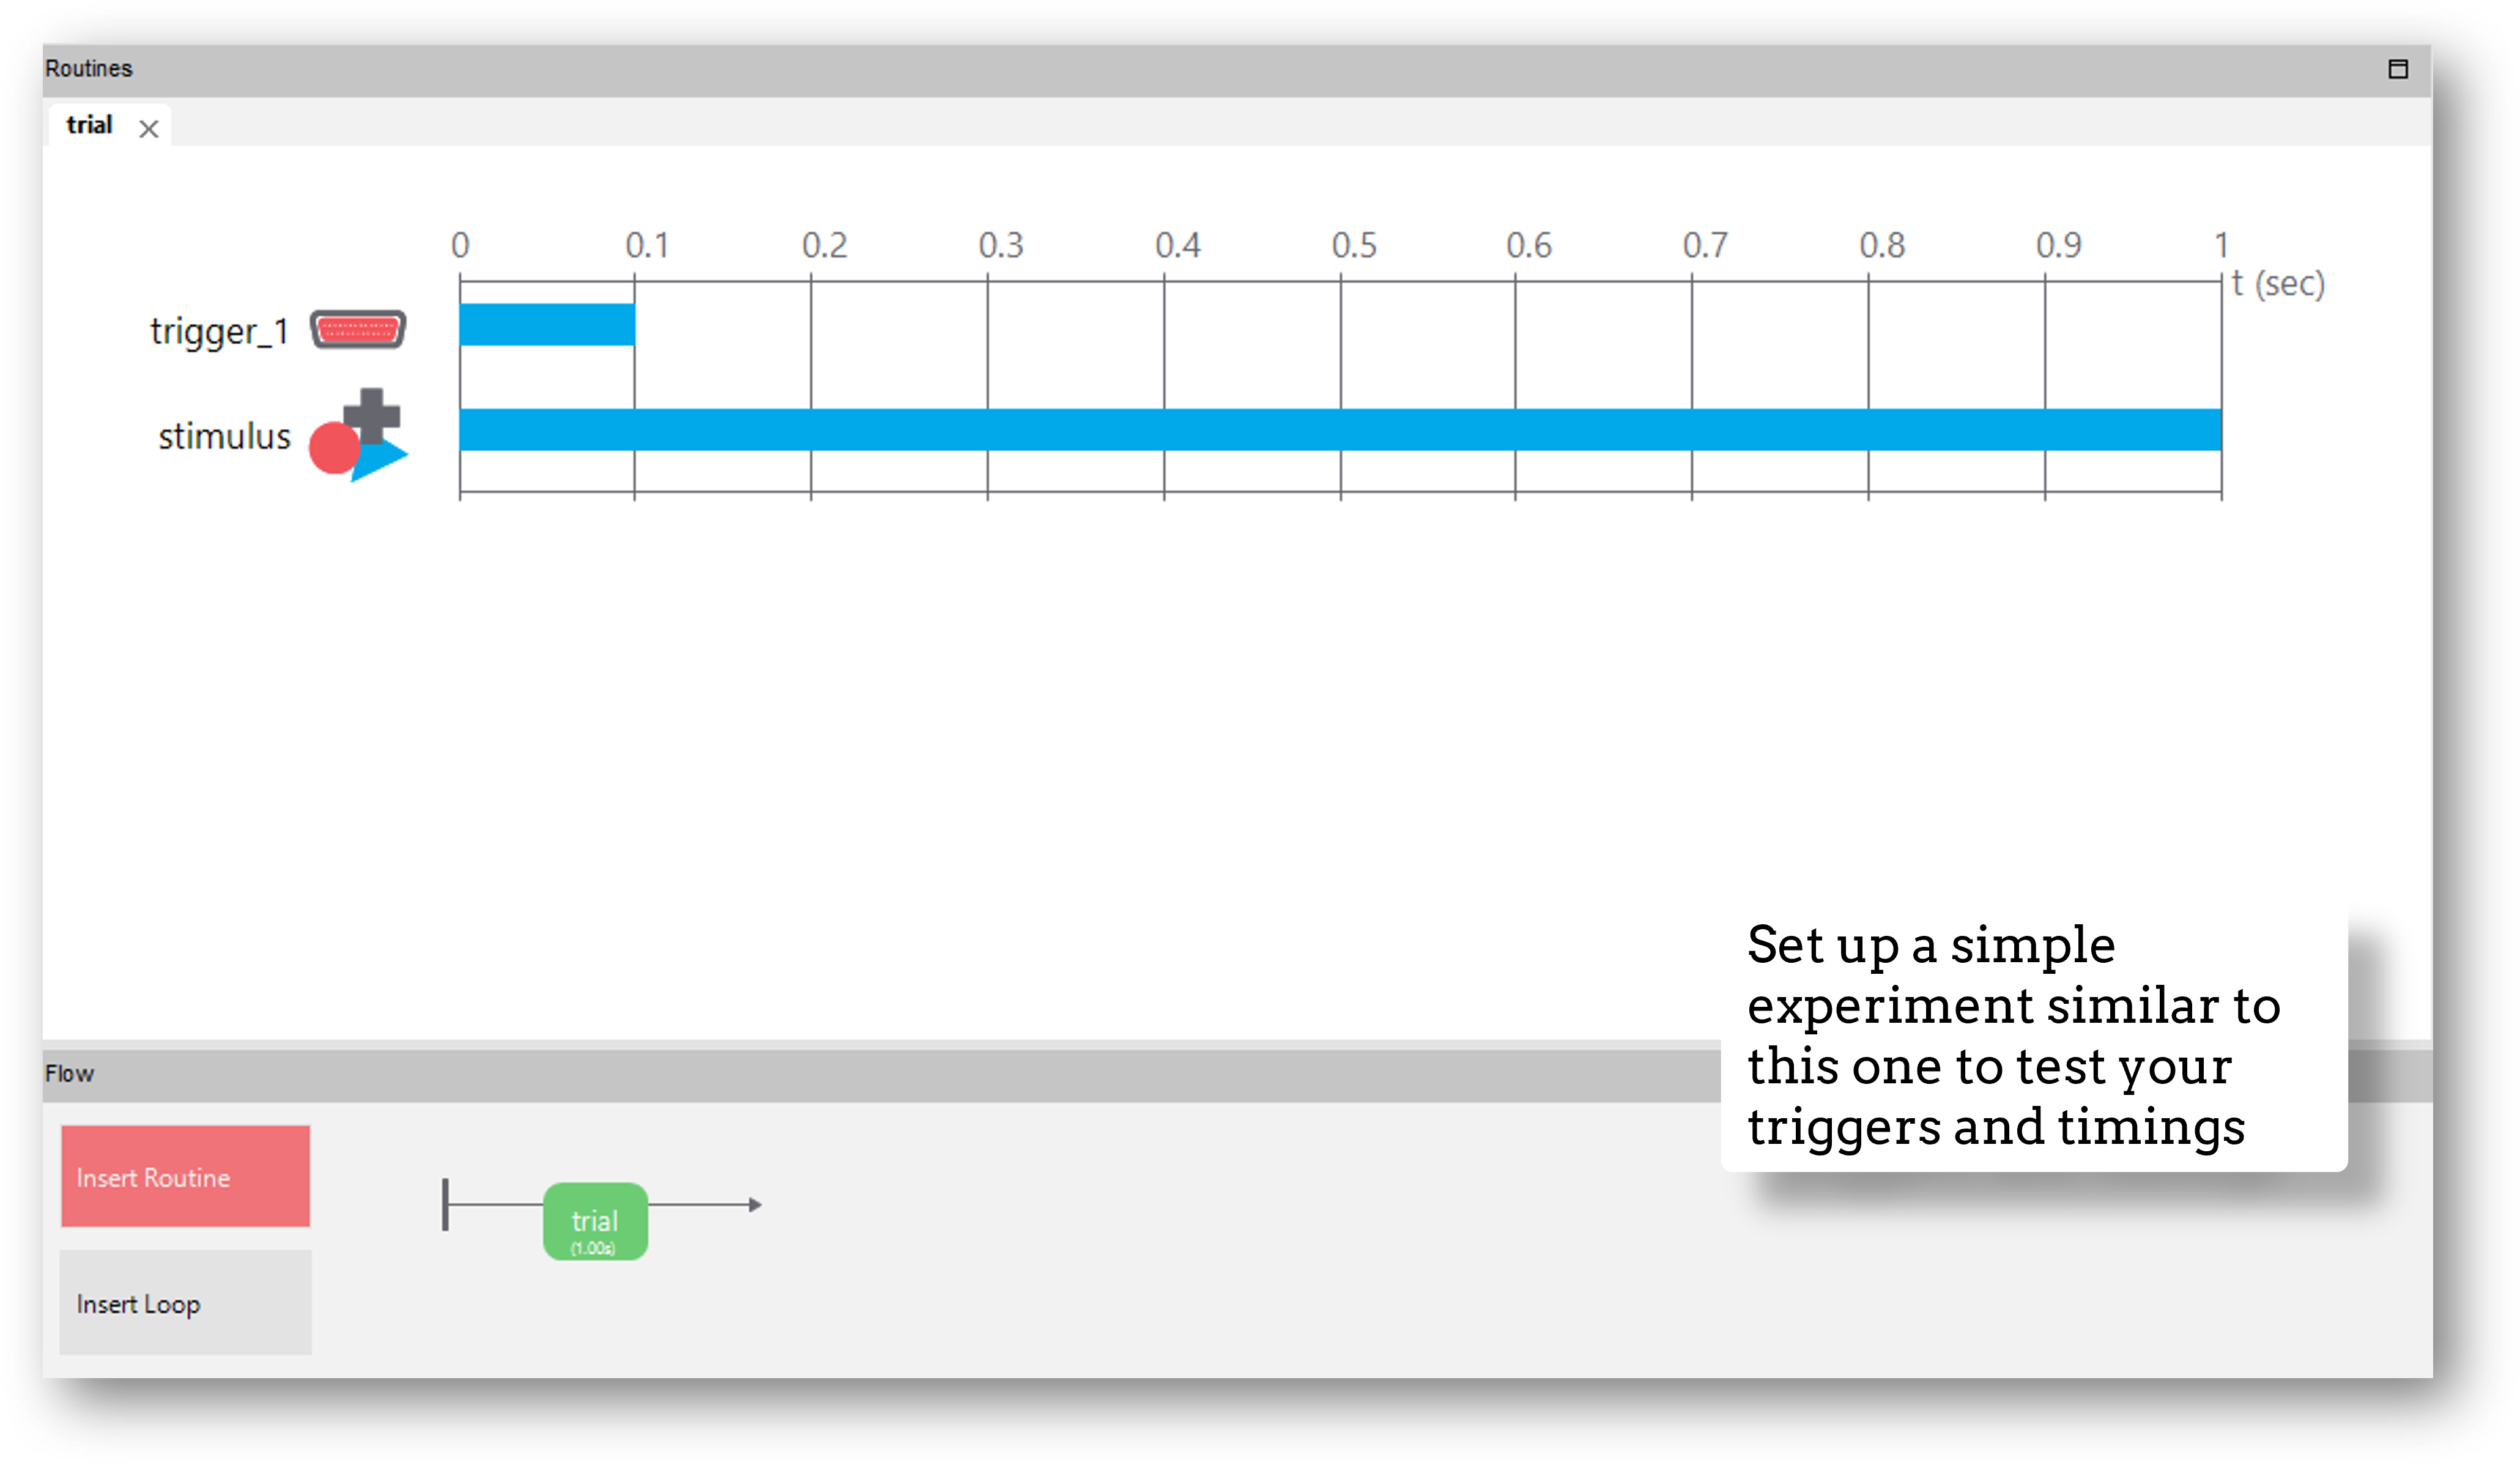
Turn on your EEG recording device and start recording as you would in your actual experiment, and just check that you see triggers coming through.
It’s a good idea at this point to also check the timing of your stimulus presentation and your triggers using, for example, a photodiode for visual stimuli.
Doing these checks with a very basic experiment just means that you don’t accidentally change something on your real experiment file that you don’t want to, and also means you don’t have to disable components or sit through lots of instructions etc!
If there is a problem - We want to know!
If you have followed the steps above and are having an issue with triggers, please post details of this on the PsychoPy Forum.
We are constantly looking to update our documentation so that it’s easy for you to use PsychoPy in the way that you want to. Posting in our forum allows us to see what issues users are having, offer solutions, and to update our documentation to hopefully prevent those issues from occurring again!